As an Amazon Associate, we earn from qualifying purchases. Some links on this site are affiliate links at no extra cost to you. Our recommendations are based on thorough research and editorial judgment.

How to Sand Wood Trim Without Rounding Edges
Have you ever tried to sand wood trim but ended up with rounded edges instead of those sharp lines you wanted? It’s a common frustration, but there’s a way to get it right.
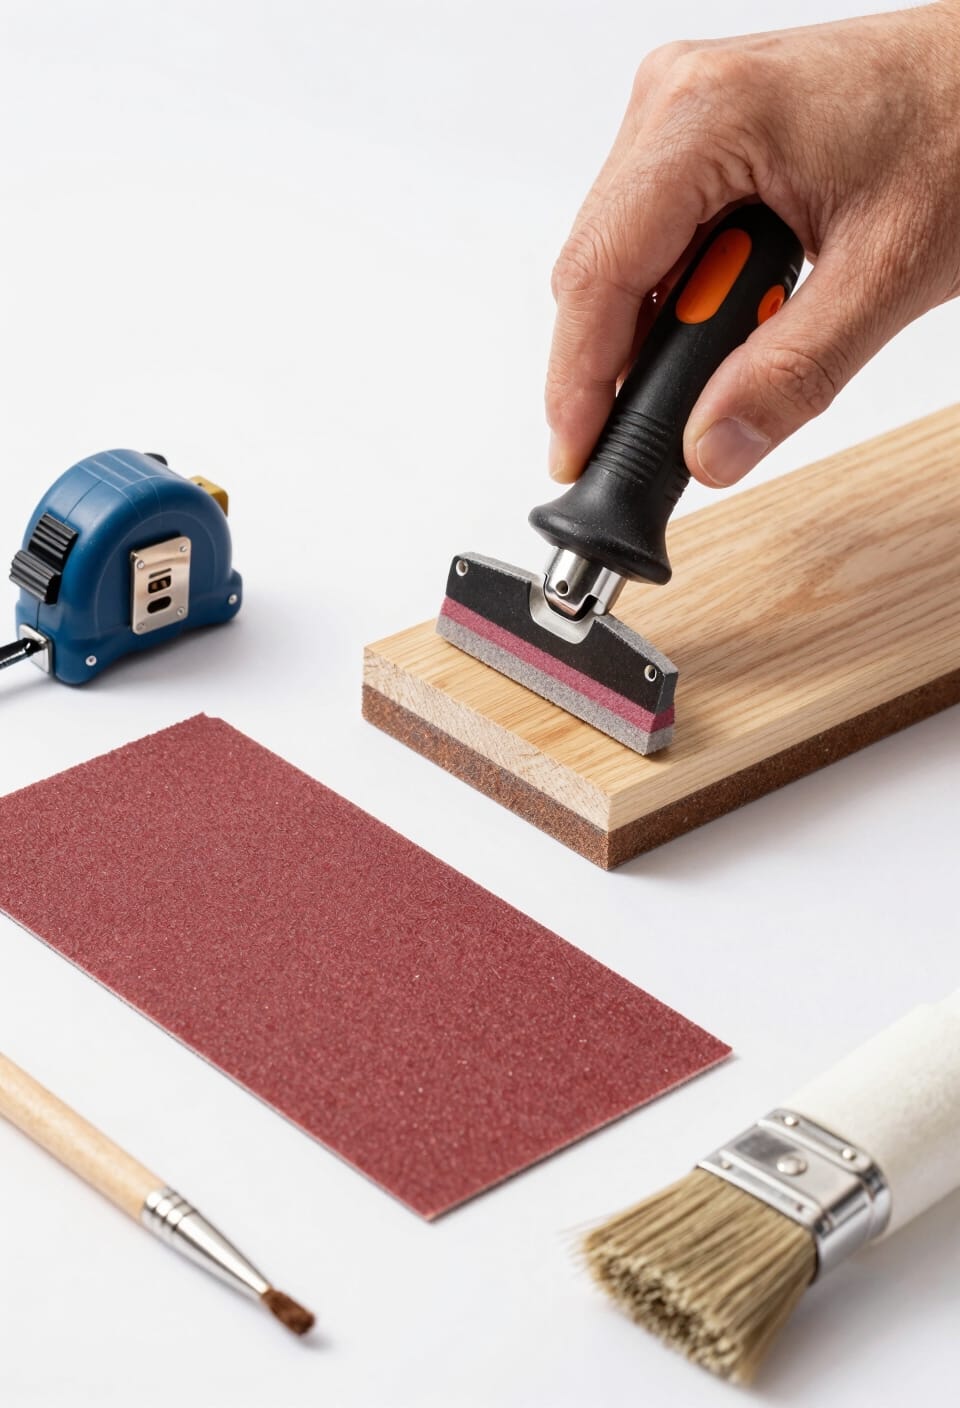
Using a hard sanding block can make all the difference. It helps apply even pressure, which means you’re less likely to accidentally round those edges.
When you’re sanding, keep your movements slow and steady, and make sure to work with the grain of the wood.
Start off with coarse grit paper to tackle any rough spots, then switch to finer grits for a really smooth finish. Here’s the trick: regularly check your progress as you go along. This can help you avoid over-sanding, which is so easy to do when you’re focused on getting it perfect.
Once you finish sanding, make sure to clean up all the dust. It’s easy to overlook this step, but it’s crucial if you want that protective finish to adhere properly. You want your trim to last and look good for a long time, right?
Truth is, if you follow these steps, you can maintain those sharp, clean lines in your wood trim.
So, what’s holding you back from giving it a go?
Key Takeaways
- Use a hard sanding block to apply even pressure and maintain consistent edge profiles.
- Sand parallel to the wood grain to prevent scratches and maintain sharp edges.
- Avoid excessive pressure when sanding to prevent rounding or uneven surfaces.
- Regularly check progress while sanding to prevent over-sanding and bald spots.
- Start with coarse grit and gradually move to finer grits for a refined finish.
Understanding Common Sanding Challenges

Sanding wood trim can be quite the challenge, can’t it? One issue that trips a lot of people up is rounding corners and edges. If you’re not careful, those sharp lines can turn into rounded messes real quick. A smart way to avoid this is by hand sanding, which gives you better control without applying too much pressure.
Using a hard sanding block is another great tip. It helps spread the pressure evenly across the surface, which means your edges stay nice and crisp. Here are a few things to keep in mind:
- Try applying slow, steady pressure while you sand; this will help keep those corners sharp.
- Make sure your sandpaper is secured tightly to your sanding block. If it slips around, you’ll end up with uneven sanding that could ruin your work.
- Don’t forget how pressure impacts thin finishes; too much pressure can expose the raw wood beneath, and that’s not what you want.
So, why does this matter? Maintaining those clean lines and edges can heavily influence the overall look of your project. Honestly, taking your time with sanding can really pay off in the end. Additionally, choosing the right grit type for your sanding task is crucial to avoid damaging edges while achieving a smooth finish.
Essential Tools for Effective Sanding Wood Trim

Sanding wood trim can be a bit tricky if you don’t have the right tools in your arsenal. So how do you make sure you’re getting the best results? Here are some essentials you should definitely have on hand:
- Sanding Block: A hard sanding block is your best friend. It helps you apply consistent pressure while ensuring those edges don’t round off during the process.
- Sandpaper: Make sure to securely attach your sandpaper to the sanding block. This keeps it from slipping and guarantees a smooth, even finish.
- Curved Sanding Blocks: These come in handy for those concave areas, while flatter blocks are perfect for tackling any convex curves.
- Hand Sanding: Don’t forget about your good old hand sanding technique, especially in the corners. It gives you that extra level of control and precision you need.
While you’re sanding, keep in mind that slow and steady pressure is key. It helps maintain the trim’s edges and prevents any damage. With these tools, you’ll not only get smoother surfaces but also keep those edges looking sharp.
For long-lasting results, pairing proper sanding techniques with seam sealers on joints can help protect wood trim from moisture and wear.
Feeling ready to tackle that wood trim project? What’s your go-to tool for sanding?
Master Hand-Sanding Techniques for Optimal Results
Want your wood trim to look professional without the hassle? Hand sanding might be just what you need. It allows for better control and keeps those sharp edges from getting rounded.
Start with a hard sanding block. This isn’t just a minor detail; it helps distribute pressure evenly and prevents those pesky corners from becoming rounded over time. You’ll thank yourself later when the edges stay crisp.
It’s all about how you move your hands. Keep it slow and steady for a smoother finish. Rushing can ruin those hard-earned edges. You don’t want to accidentally sand too hard and give your trim that soft, unfinished look.
Make sure to secure your sandpaper to the block well. If it’s slipping around, you’ll end up with uneven surfaces instead of that flawless finish you’re aiming for. Consistent contact is key to getting it right.
And remember to sand parallel to the grain. Why is this important? It helps maintain those sharp edges and keeps visible scratches at bay. Trust me, you’ll appreciate the difference when you see how clean the final product is.
In the end, taking your time with hand sanding pays off. You’ll get that professional look without needing to break the bank. So, what’s stopping you from diving into your next project?
For added longevity and a cleaner workspace, consider using sanding screens with an open mesh design that resists clogging and allows dust to escape efficiently.
What Common Sanding Mistakes Should You Watch Out For?
Sanding wood trim can feel pretty satisfying when you see the transformation, but if you’re not careful, it’s easy to mess things up. Have you ever gotten excited about a project only to realize you’ve made some rookie mistakes? Let’s talk about some common pitfalls to watch out for that can really ruin your finish.
First off, over-sanding corners is a biggie. It’s tempting to smooth everything out completely, but if you sand too much around the edges, you might create bald spots that just look bad. No one wants that!
Another mistake is rushing the process. I get it—you’re excited to see the final result. But when you hurry, surfaces can end up uneven. That means any finish you apply will struggle to look right.
Excessive pressure is also a culprit. Don’t press down too hard; it might feel satisfying, but it can round those sharp edges that you want to keep. Think about it: that clean, crisp look is part of what makes your trim pop.
And honestly, if you skip proper drying time for your finishes, you’re asking for trouble. You might end up with blistering or a sheen that looks anything but consistent. Give those coats time to do their job!
Lastly, be sure to sand all surfaces uniformly. Inconsistent sanding can lead to noticeable imperfections once you’re done. It’s those little details that really stand out in the final product.
Using the right sealer after sanding, such as one with excellent moisture protection, can help preserve the integrity and appearance of your wood trim over time.
In a nutshell, avoid these common mistakes to achieve that professional finish you’re looking for. So, what’s the most challenging part of sanding for you?
How to Achieve a Smooth Finish Without Compromising Shape
Achieving a smooth finish on your wood trim can feel like a tricky task, especially if you’re worried about losing the shape and detail of the trim. You want that polished look, but not at the expense of flat edges or fine details. So, how do you manage that?
Start by using a hard sanding block. This is really important because it allows you to apply even pressure while sanding, which helps prevent taking away too much material, particularly at corners and edges. The last thing you want is to accidentally round off the sharp lines that give your trim its character.
Try hand sanding for better control, too. It gives you the precision you need to smooth out those flat surfaces while keeping those edges crisp. Plus, there’s something satisfying about having that hands-on touch.
When you attach your sandpaper to the block, make sure it’s secure. It needs to stay put while you work, so you can focus on applying slow and steady pressure. Don’t rush through this part—it’s about doing it right.
Now, it’s time to pick your grit. Start with 150 grit sandpaper and be sure you sand with the grain of the wood. This helps avoid any unsightly blemishes that could be left behind. Think about it—nobody wants to see scratches going against the grain!
Consistency is key here. Make it a point to thoroughly sand all visible areas. If you skip spots, it’ll stand out big time and ruin the overall look of your trim. Take your time, and you’ll appreciate the effort when that smooth finish comes together.
Also, selecting high-quality aluminum oxide sandpaper with anti-clogging properties can help maintain efficient sanding without losing abrasive power.
So, why does this matter? Because that attention to detail can really elevate how your space feels. With a little effort and a few solid techniques, you can achieve a beautiful finish without sacrificing the character of your wood trim.
Frequently Asked Questions
How to Sand Without Rounding Edges?
We can preserve edges by using a hard sanding block, applying light pressure, and focusing on flat surfaces. Let’s periodically check our progress to guarantee those sharp edges remain distinct throughout the sanding process.
How to Sand a Rounded Edge on Wood?
When we sand a rounded edge on wood, we should use proper sanding techniques like a custom sanding block, opt for finer grit sandpaper, and always sand with the grain to maintain its shape and finish.
What Is the 100 Grit Rule?
The 100 grit rule is a sanding technique we use to start with sandpaper that’s 100 grit or higher. It helps us avoid rounding edges while ensuring our wood surfaces remain smooth and well-defined.
How Can You Keep the Edge Square When Sanding?
To keep edges square when sanding, we must focus on edge preservation. Employing a hard sanding block with controlled pressure, we can glide along the grain, ensuring the edges remain sharp and true, like mastering an art.


