As an Amazon Associate, we earn from qualifying purchases. Some links on this site are affiliate links at no extra cost to you. Our recommendations are based on thorough research and editorial judgment.

How to Protect Cabinets and Shelving From Sanding Dust
Have you ever finished a sanding project only to find dust settled in every nook and cranny of your cabinets and shelves? It’s frustrating, isn’t it? But don’t worry; there are some straightforward steps you can take to keep that pesky dust at bay.
Start by covering your cabinets with plastic sheeting or drop cloths. This might seem simple, but it makes a big difference.
Once those surfaces are covered, grab some painter’s tape and seal up any gaps. This little trick really helps keep the dust from sneaking in.
Now, if you want to truly minimize dust during sanding, consider using a HEPA vacuum attachment. These are great for capturing dust right at the source.
You might also find that using a damp cloth nearby can help keep the air cleaner by reducing airborne particles.
After you finish sanding, it’s crucial to clean up properly. Using a soft cloth consistently can help keep surfaces looking pristine.
Honestly, nobody wants to deal with a dust storm every time they open a cabinet.
So, what do you think? With these tips, you can breathe a bit easier while you tackle your next project. Just remember, a little prep goes a long way in protecting your home.
What’s your go-to method for keeping dust at bay?
Key Takeaways
- Empty cabinets and shelves before sanding to prevent dust accumulation on belongings and surfaces.
- Use plastic sheeting or tarps to create protective barriers around cabinets against sanding dust.
- Seal gaps with weather stripping or painter’s tape to minimize dust intrusion into cabinets.
- Keep a HEPA vacuum nearby for regular cleaning and immediate dust collection during sanding.
- Implement a daily cleaning routine using damp cloths to effectively capture and reduce dust particles.
Understanding the Impact of Sanding Dust on Cabinets

Understanding the impact of sanding dust on cabinets is crucial if you want to keep them looking sharp and lasting longer. When you sand, you create fine dust particles that can settle on surfaces, and trust me, they can really mess up that beautiful finish. Not only can this dust tarnish the look of your cabinets, but if it builds up, it can seriously mess with paint adhesion too. This means your cabinets might not stay sturdy for as long as you’d like.
Now, wood cabinets? They’re even more at risk. Dust loves to sneak into all those little crevices and joints. This means you’ll end up doing a lot more cleaning than you might have bargained for. And let’s not forget, if you’re working in a space with poor ventilation, that dust isn’t just a nuisance; it can pose some real health risks. So, tackling this dust issue is way more important than you might think.
To keep your cabinets safe and your workspace clean, consider these tips:
- Always cover your cabinets with the right protective materials before you start sanding.
- Set up dust containment measures. Think tarps or vacuum systems that can catch those particles.
- Make it a habit to regularly wipe down surfaces to keep dust from piling up.
It also helps to use sanding discs with effective dust extraction features, which reduce airborne particles and keep your workspace cleaner.
Now, you might wonder why these steps matter. Well, taking a few proactive measures can save you time and effort in the long run, not to mention preserve the beauty of your cabinets.
Bottom line: managing sanding dust is key to maintaining your cabinets. It’s worth the extra effort to protect them, don’t you think?
Essential Tools for Dust Protection

When it comes to sanding projects, keeping dust away from your cabinets can feel like a daunting task. No one wants to deal with a layer of dust settling on everything after putting in all that hard work. So, what can you do to prevent this? Here are some essential tools that can really help you out:
- Dust Collection: Using a HEPA vacuum attachment on your sanding tools is a smart move. This handy device captures dust right where it’s generated, helping to protect your cabinets from unwanted grime.
- Plastic Sheeting: Instead of leaving your cabinets exposed, you should cover them with plastic sheeting or drop cloths. This simple step creates a strong barrier that keeps dust at bay.
- Dust Mask: Don’t forget about your own protection! A good dust mask is essential for keeping those harmful particles from getting into your lungs while you’re sanding.
- Air Scrubber: If you want to go the extra mile, consider making a DIY air scrubber using a fan and a filter. It can continuously clean the air while you work, making your environment safer.
- Damp Cloths: Here’s a trick: using damp cloths during wet sanding can significantly reduce the amount of dust you create. This method is way cleaner than traditional dry sanding.
In addition, using sanders equipped with dust collection systems can significantly improve dust control and minimize cleanup efforts.
In the grand scheme of things, dust control is about making your workflow smoother and your space cleaner. Implementing these tools can save you a lot of hassle and make your project more enjoyable. What tools do you find most useful in your own dust control efforts?
Recommended Products

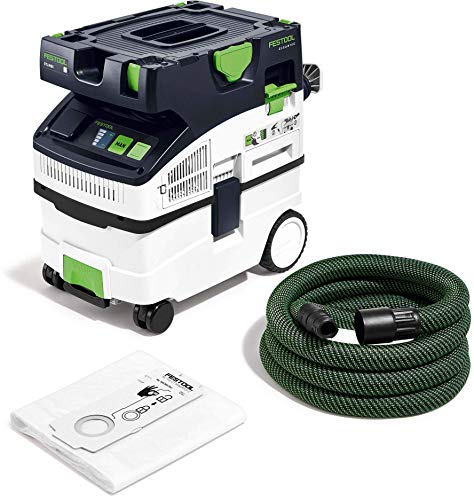
Intuitive: Push-button controls make it easy to operate the extractor.

Intuitive: Push-button controls make it easy to operate the extractor.

Intuitive: Push-button controls make it easy to operate the extractor.
Step-by-Step Preparation: Covering Surfaces and Sealing Gaps

Getting ready to sand your cabinets can feel like a daunting task, especially when you think about the dust that will inevitably float around your home. So, what’s the best way to tackle this? Start by emptying out everything from your cabinets and shelves. This not only clears your space but also stops dust from settling on your belongings.
Next, it’s time to cover your furniture. Lay down some plastic sheets, tarps, or drop cloths to create a protective barrier. This helps keep dust from sneaking into other rooms and landing on your favorite chair or table.
Now, let’s talk about sealing those pesky gaps. A simple solution is to use weather stripping or painter’s tape around cabinet doors and shelves. This little step can be surprisingly effective at keeping dust where it belongs—at the worksite.
While you’re sanding away, don’t forget about the importance of regular cleaning. Keep a vacuum handy to suck up dust as it builds up, and consider using an air scrubber or HEPA filters. These tools can significantly improve your air quality, making your workspace a whole lot more pleasant.
Additionally, selecting durable drop cloths made from high-quality materials can provide reliable protection against dust and debris during sanding.
Taking these steps not only creates a cleaner environment but also makes the whole sanding process less daunting. Remember, a little preparation goes a long way. So, are you ready to get started on that cabinet project?
Recommended Products

[Made of High - quality Materials] The cabinet body is crafted from cold rolled steel plates through the die casting molding process. It features a surface treatment of phosphorus-free electrostatic powder coating. The drawers are fabricated from ABS/PS materials that are eco-friendly, possess high strength, and exhibit excellent impact resistance.

【High Quality Materials】Thickened Premium Acrylic (3mm thickness) + Upgraded 10mm thickened Wood-Plastic base. Effectively reduces sunlight and UV radiation.

♥【Small-Space Storage Savior】Our lightweight plastic storage cabinet fits flexibly in bedrooms, living rooms, balconies, or even behind doors. Multi-layer compartments keep clothes, bedding, and miscellaneous items neatly organized. No drilling or installation needed—even one person can set it up easily. Instantly frees up floor space, turning your compact home into an orderly haven. Perfect for small-space dwellers and renters.
Choosing the Right Dust Containment Materials
Choosing the Right Dust Containment Materials
Tackling a cabinet sanding project at home can feel like an uphill battle when it comes to keeping dust under control. You probably don’t want a fine layer of sawdust settling on your furniture, right? Let’s dive into some materials that can really help.
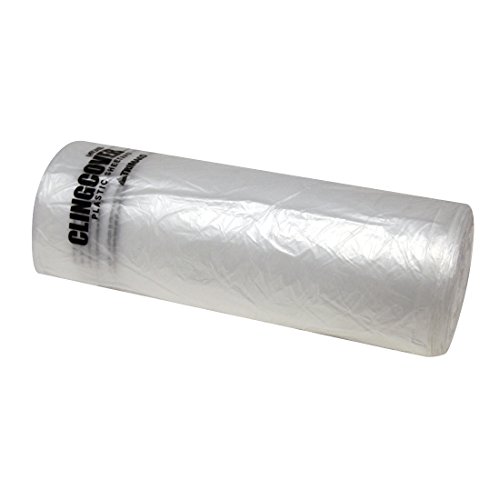
First off, try using some sturdy plastic sheeting. A thickness of 4mm to 6mm is ideal for sealing off your work area from everything else in the house. This simple step can make a huge difference in minimizing the spread of all that dust.
Another quick win is putting weatherstripping around the cabinet doors. It’s a small detail that can block dust from sneaking in and accumulating on surfaces you’d rather keep clean. Plus, it’s a cheap fix that takes just a few minutes to do.
Thinking about how to get in and out of your workspace without making a mess? Consider installing a dust containment door kit with a zipper. It allows easy access while cutting down on dust escape routes.
Don’t forget about the insides of your cabinets! You can protect surfaces with non-adhesive shelf liners. They act as a barrier against dust and scratches, which is a win-win.
And here’s a tip you might not have thought of—heavy-duty tarps or drop cloths are fantastic for covering nearby furniture and floors. When sanding, these will catch most of the dust that tries to escape, keeping your home cleaner overall.
For the most reliable protection, choose plastic sheeting that offers waterproof resistance to prevent moisture-related damage during your project.
In short, having the right materials on hand goes a long way in keeping your space clean during a sanding project. So, what’s your next move to prepare for your DIY adventure?
Recommended Products

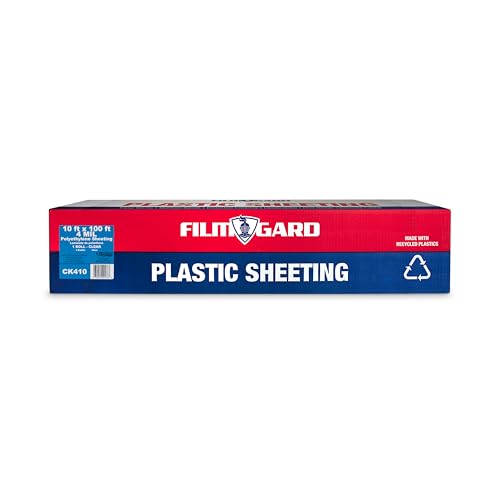
Film-Gard 625930 Construction Plastic Sheeting 12' Width X 100' Length X 4 mil thick, Clear, 1 count
The product is good to use
MULTI-PURPOSE: this durable, construction-grade polyethylene sheeting provides protection against water vapor and foreign matter
Dimensions: 9' x 400' dispenser box
Techniques for Effective Dust Management During Sanding
Sanding can be a messy job, and dealing with dust can be a real pain. If you’ve ever tackled a DIY project, you know how frustrating it can be to clean up after sanding. Thankfully, there are some effective ways to keep that dust under control.
First off, grabbing a shop vac is a smart move. If you attach a drywall sanding attachment, it can really cut down on dust as you work. You’ll find fewer particles flying around, which makes for a much cleaner workspace.
Another tip that works wonders is wet sanding. This involves dampening the surface you’re working on, which helps keep the dust from becoming airborne. While it might sound a bit messy, it’s really effective in managing the dust clouds that usually come with sanding.
Don’t forget about cleaning as you go! Keep a HEPA vacuum handy to catch those fine dust particles before they accumulate. It makes a big difference and can save you a lot of time during cleanup later on. You’ll thank yourself when it’s time to paint and you don’t have to deal with a dust-covered surface.
Also, think about sealing off nearby areas. Cover cabinets and shelving with plastic sheeting and tape. It’s a simple step that protects your space from settling dust. It might feel like an extra chore, but trust me, you’ll appreciate the effort when your home stays cleaner.
Finally, once you’re done sanding, finish things up with damp sponges or rags on your joint compounds. This helps to keep the dust minimal before you even think about painting.
To protect your respiratory health during these dusty tasks, consider wearing a NIOSH-approved dust mask to filter out harmful particles effectively.
Recommended Products

Powerful 12 AMP Motor Generates 148 CFM of Suction Power and 92" of Water Lift
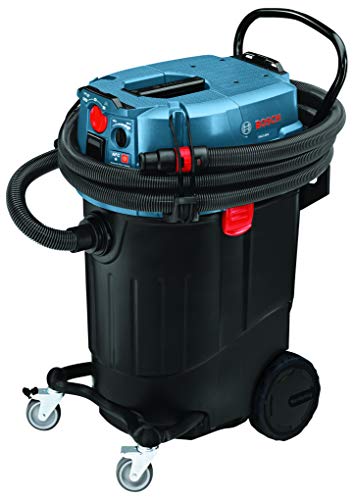
AUTO-CLEANING: With automatic filter cleaning, the Bosch VAC140AH dust extractor cleans the filter every 15 seconds to help maintain maximum suction power.
Touch operation for intuitive control of the mobile dust extractor
Air Quality Strategies During Cabinet Projects
When tackling cabinet projects, you might notice that dust and poor air quality can make things uncomfortable and a little risky. It’s important to keep the space clean and fresh. Here are some practical tips to help you breathe easier while you work:
- Build a DIY Air Scrubber: A simple air scrubber made with a box fan and a HEPA filter can be a lifesaver. This setup works wonders to cut down on airborne dust, keeping your workspace clearer.
- Get an Air Quality Monitor: Ever wonder how much dust is floating around while you’re sawing and sanding? An air quality meter can give you peace of mind by measuring dust levels to ensure they’re safe as you go about your project.
- Open Up Those Windows: A little fresh air can really do wonders. By keeping windows open, you encourage airflow, and if you add a box fan into the mix, you’re really circulating that air, which helps dilute any dust.
- Set Up Ambient Air Filters: You can make your workspace a lot more pleasant by incorporating air filter boxes. They catch a good amount of dust, helping improve overall air quality, so you don’t have to worry as much while you’re busy crafting.
- Use Dedicated Vacuums: It’s worth investing in vacuums that are made for collecting dust generated by tools. They’re designed for this purpose and will keep the area cleaner, ensuring less mess means a safer work environment.
To protect the electrical components in your tools from dust-related damage, consider cleaning contacts with a residue-free contact cleaner regularly.
Truth is, maintaining good air quality while working on cabinet projects doesn’t have to be complicated. A few straightforward strategies can make a big difference. So, are you ready to start your project with cleaner air?
Recommended Products

One Dri-Eaz HEPA 700 Air Scrubber with Optional Activated Carbon Filter, 700 CFM, large room air purifier

Commercial Air Purifier: The AS1000 HEPA air scrubber removes smoke, pet dander, pollen, saw dust, and other miscellaneous debris; it’s designed to remove hazardous and non-hazardous air-borne particles in large indoor spaces and clean contaminated air in indoor environments and areas damaged by water or fire

Powerful Filtration: The MOUNTO 1000CFM HEPA Air Scrubber is equipped with a 6-inch true HEPA Filter, capable of capturing 99.97% of airborne particles as small as 0.3 microns, ensuring cleaner and healthier air.
Maintaining a Clean Work Environment
Have you ever walked into a work area and been overwhelmed by the dust and clutter? It can really take away from your focus and productivity. Keeping your workspace clean doesn’t have to be a monumental task. Here are some straightforward tricks you can try:
Using a HEPA vacuum can make a big difference. It sucks up even the smallest bits of sanding dust, so you won’t have that annoying fine layer settling on everything. It’s best to make this a regular habit, too. Just imagine how nice it’d be walking into a space that’s truly clean.
Another helpful tip is to seal off your cabinets and shelving with plastic sheeting when you start sanding. This protects your stuff and keeps dust from piling up where you don’t want it. Honestly, this small step can save you a lot of time and frustration later.
Think about creating a daily routine for yourself. Sweeping and vacuuming can be quick and easy. If you make it a point to do this every day, you’ll see a noticeable reduction in dust buildup. And don’t forget to clear off shelves and cabinets before you start sanding. It helps keep your workspace tidy and reduces clutter.
Damp cloths are your friends. Use them regularly to wipe down surfaces, and you’ll catch dust particles before they have a chance to spread. So, why does this matter? Keeping a clean work area helps you stay focused and productive without the distractions of dust everywhere.
Using proper adhesive tapes can also protect surfaces from dust and moisture, making your cleaning process easier and your workspace more efficient.
To wrap it up, maintaining a clean work environment doesn’t have to be a chore. A few simple strategies can go a long way. Next time you’re about to dive into a project, think about these tips and how they could help you keep your space clean. How do you keep your work area tidy?
Cleaning Up After the Project
Cleaning up after a project isn’t just about making things look nice—it’s really about taking care of your cabinets and surfaces so they last longer. Ever notice how dust seems to settle everywhere when you’re working on something? It’s like a sneaky invader! Here are some straightforward tips to help you tidy up after the chaos.
First, consider regular clean-ups during your project. A quick vacuum and sweeping every now and then can save you from a mountain of dust at the end. It’s a small effort that pays off, trust me.
After the project wraps up, take a damp cloth and wipe down all the surfaces. This is an effective way to gather dust instead of just pushing it around. You’d be surprised at how much can settle into those little nooks and crannies.
Don’t skip the space around your cabinets. It’s easy to overlook, but that area often holds dust remnants that can creep in if left untreated. A good cleaning there can really help in keeping things fresh.
And hey, while you’re at it, take everything out of those cabinets and give the interiors a good scrub. It might feel tedious, but it’s necessary for eliminating any leftover dust. Plus, you might find things you forgot you had!
Improve the air quality by using a HEPA vacuum or air scrubber, too. Capturing airborne dust makes a huge difference, reducing what settles later on. So, why go through the extra effort? Your home will feel cleaner and healthier.
Wearing a mask with high filtration efficiency is also a smart precaution to protect your lungs from fine dust particles during cleanup.
At the end of the day, taking time to clean up properly is worth it. It helps maintain your space and prevents dust from becoming a long-term issue. When was the last time you did a deep clean after a project?
Long-Term Maintenance: Keeping Cabinets Dust-Free After Renovation
Ever notice how your freshly renovated cabinets can quickly gather dust? Keeping them clean is an ongoing task that really makes a difference in how they look and last. Here are some practical tips to help you maintain that just-renovated vibe:
First off, regular cleaning is key. Just grab a soft cloth or a damp rag to wipe down your cabinet surfaces, and don’t forget those handles and knobs—they’re magnets for dust and germs. Setting a routine for this can save you a lot of trouble down the road.
Now, let’s talk about deep cleaning. At least once a year, it’s worth the effort to empty your cabinets completely. Wipe down the shelves and tackle any stains with a mild cleaning solution. This might seem like a big chore, but it’s the best way to ensure that your cabinets stay looking great.
Another handy tip? Use non-adhesive shelf liners inside cabinets. They offer protection against scratches and spills, making cleanup much easier. Plus, they come in all sorts of colors and patterns to give your cabinets a little extra personality.
Humidity control is also super important—especially in the kitchen. Consider using exhaust fans while cooking and keeping an eye on the temperature with your HVAC system. This helps prevent moisture damage and keeps everything in good shape. So, why does this matter? Well, a little prevention goes a long way.
Don’t forget about your hardware! Check those screws now and then; tight hardware helps maintain a dust-free space and ensures everything functions smoothly. It’s those little details that really help preserve your cabinets in the long run.
Additionally, using tools with felt edges can minimize surface scratches during cleaning or maintenance, preserving the cabinet finish.
In short, keeping cabinets clean after a renovation isn’t a one-time task. Staying on top of these habits can really enhance their lifespan and overall look. What’s your go-to method for keeping surfaces dust-free?
Frequently Asked Questions
How to Prevent Dust From Getting on Shelves?
To prevent dust from getting on shelves, we should use dust barriers like plastic sheeting and apply protective coverings. Regularly cleaning surfaces with a damp cloth helps maintain cleanliness and keeps dust buildup at bay.
How to Not Get Dust Everywhere When Sanding?
To avoid dust everywhere when sanding, we should use effective sanding techniques, implement dust containment measures, and apply protective coverings. Covering surfaces and utilizing vacuums will greatly help keep our work area clean and dust-free.
How to Keep a Cabinet Dust Free?
Oh sure, let’s just invite dust for a party in our cabinets! Instead, we should follow cabinet maintenance tips, using smart cleaning techniques and dust containment solutions to keep everything sparkly and dust-free. We can do it!
What to Put on Top of Cabinets to Prevent Dust?
To prevent dust, we can use cabinet covers or protective sheeting. Adding dust barriers around the area also helps. Let’s make certain everything’s securely fastened to keep our cabinets clean and dust-free during projects!


