As an Amazon Associate, we earn from qualifying purchases. Some links on this site are affiliate links at no extra cost to you. Our recommendations are based on thorough research and editorial judgment.

How to Prep Cabinets for Repainting (Clean + Scuff Workflow)
Have you ever looked at your kitchen cabinets and thought they could use a fresh coat of paint? Prepping them for repainting is key to getting that smooth, long-lasting finish you want.
Let’s walk through a simple clean and scuff workflow that’ll make your cabinets look brand new.
Start by removing the doors and drawers. Label them so you won’t have any mix-ups later. Then, it’s time for a good clean. Grab a gentle degreaser and wipe down all the surfaces. This step is super important because you need to get rid of any grease or grime that could mess with your paint job.
Once everything is clean, the next step is scuffing. Use medium-grit sandpaper, around 100-150 grit. Giving the surfaces a light scuff helps the new paint stick better. After that, make sure to wipe down everything again with a damp cloth to get rid of any dust particles.
And don’t forget to lay down drop cloths—trust me, you’ll want to protect the floor from any accidental spills.
So, why does all this matter? Good prep means better paint adhesion, leading to a smoother finish and longer-lasting results. When you take the time to prep properly, you’re setting yourself up for success.
Now that your cabinets are prepped, we can dive into the different types of primers available. The right primer can make all the difference in achieving that perfect look!
Key Takeaways
- Remove all doors and drawers from cabinets, labeling each for easy reassembly later.
- Clean cabinet surfaces with a gentle degreaser, focusing on high-traffic areas for grease removal.
- Lightly scuff the surfaces using medium-grit sandpaper (100-150 grit) to enhance paint adhesion.
- Wipe down the cabinets with a damp cloth or tack cloth to eliminate dust before preparing to paint.
- Protect the workspace by laying down drop cloths and using painter’s tape along edges for clean lines.
Essential Prep Steps for Cabinet Painting

Ready to tackle those cabinets but don’t know where to start? The prep work may seem tedious, but trust me, it’s crucial for a smooth painting experience.
First things first, pull off all the doors and drawers. Label each piece as you go to make reassembly a breeze later on. Once everything is off, it’s time to give those surfaces a good clean. Grab a gentle degreaser—not too harsh—and scrub away any stubborn grease. This step is key since a clean surface really helps the paint stick.
Now, here’s the trick: you need to scuff up the cabinet surfaces. Use medium-grit sandpaper (around 100-150 grit should do) to create a bit of texture. This will help the paint cling on better. After you’ve scuffed everything, don’t forget to wipe down the surfaces with a damp cloth. Make sure everything is clean and dry before you slap on that primer.
And let’s not forget about protecting your space! Lay down drop cloths and use painter’s tape around areas you don’t want to get paint on. It’ll save you a lot of cleanup later and help keep your workspace tidy.
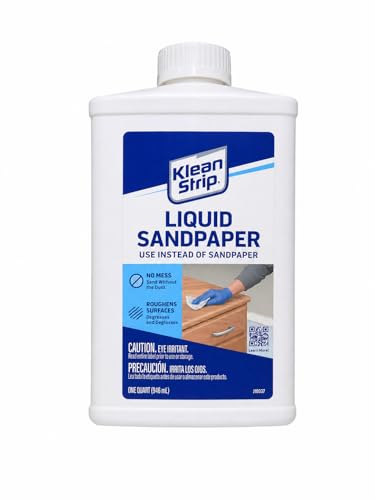
Getting started on painting your cabinets can feel overwhelming, but breaking it down into steps makes it manageable. You’re on your way to a refreshed kitchen—what color are you thinking of choosing? Be sure to address any surface imperfections beforehand using a no-sand spackling compound to ensure a perfectly smooth finish.
Recommended Products
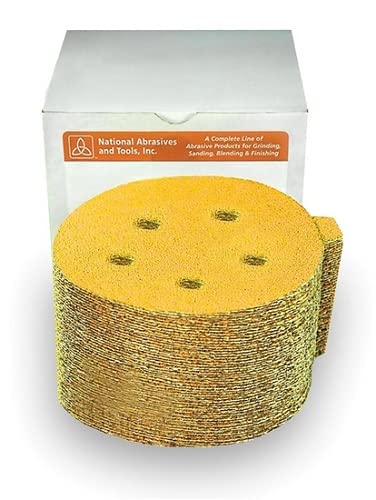
These Discs Provide A Quick And Cool Cut

Product 1: Sandsmart control continuously monitors the load on the drum motor and automatically regulates the speed of the conveyor motor

Sandsmart control continuously monitors the load on the drum motor and regulates the speed of the conveyor motor to maintain the highest feed rate without overload
Essential Supplies for Effective Cabinet Prep

Getting your cabinets ready for a fresh coat of paint can feel overwhelming. It takes some time and effort, but having the right supplies makes all the difference. So, what do you really need? Let’s break it down.
First, start with cleaning supplies. A good degreaser will do wonders to remove all that stubborn grease and oil. This step is crucial for ensuring that the paint sticks well. Don’t skip it!
Next up is medium-grit sandpaper—aim for 100-150 grit. This stuff is perfect for giving your surfaces a light scuff, which really helps the paint adhere better. Ever notice how a little prep leads to a lot better looking finish?
Now onto the imperfections. You’ll want to grab a flexible putty knife and wood filler****. Dents and scratches happen, but with these tools, you can easily smooth them out before painting. It’s amazing what a little filling can do to enhance the overall look of your cabinets.
Once you’ve repaired those imperfections, it’s time to focus on the dust. Tack cloths are your best friend here. They do a fantastic job of picking up the final bits of dust before you break out the paint. You want that surface to be pristine, right?
Oh, and don’t forget about drop cloths! They’re essential for protecting your floors and furniture from the inevitable paint splatter. Trust me, you don’t want to be cleaning paint off your hardwood floors later.
For the sanding step, consider using fine grit sandpaper after the medium grit to achieve an even smoother surface for a professional finish.
Recommended Products
PAINT AND CLEANING SUPPLIES

INCLUDES: (1) Abrasive Cleaning Stick; Size: 12” X 2” X 2”

REJUVENATE & RESTORE - The natural rubber sandpaper cleaning stick effectively removes residue, making it an essential tool for woodworking. Use as sandpaper cleaner or belt sander cleaner to restore sanding belts and abrasive materials to like-new condition.
Step-by-Step Kitchen Cabinet Cleaning

Cleaning your kitchen cabinets can feel like a daunting task, especially when you’re planning to repaint. But, tackling this head-on can really set the stage for a smooth and successful project.
Gather Supplies: Before diving in, grab some essentials. You’ll want a gentle degreaser, medium-grit sandpaper (around 100-150 grit), a damp cloth for wiping down surfaces, and don’t forget about protective gear like gloves and masks! Lay out some drop cloths to protect your flooring too.
Clean: Start by applying that degreaser to your cabinets. Focus on areas that see a lot of activity—think around the stove or the handles. This step is key to getting rid of all that built-up grease and grime.
Scuff Sanding: Once you’ve cleaned the cabinets, it’s time to grab that sandpaper. Lightly scuff the surfaces; this is crucial as it creates texture for better paint adhesion. It might seem tedious, but it’s worth it for a smooth finish later.
Wipe Down: After sanding, give everything a good wipe with a damp cloth to remove all the dust and debris. You don’t want any of that getting trapped under your fresh paint!
Protect Surroundings: Lay down those drop cloths, especially if you’re working in a tight space. It’ll save you from stress later if there’s a paint splatter waiting to be cleaned up.
Using a water-based sealer after prep can improve paint adhesion and protect your cabinets from moisture damage.
At the end of the day, cleaning your cabinets properly is a vital step before diving into your repainting project. Are you ready to see how fabulous your kitchen can look?
Recommended Products

Delivers superior cleaning, degreasing, and deodorizing power

POWERFUL DEGREASING ACTION: Experience unmatched cleaning power with our industrial-grade degreaser, effortlessly tackling grease, carbon, and stubborn grime. Its advanced formula ensures deep cleaning results every time.

𝗛𝗜𝗚𝗛𝗟𝗬 𝗖𝗢𝗡𝗖𝗘𝗡𝗧𝗥𝗔𝗧𝗘𝗗 𝗙𝗢𝗥 𝗠𝗔𝗫𝗜𝗠𝗨𝗠 𝗩𝗔𝗟𝗨𝗘 - One 8 oz bottle of Citra Solv makes up to 11 gallons of all-purpose cleaner. Dilute in water for all your household cleaning, while leaving your home filled with the refreshing scent of oranges.
Scuffing and Sanding Techniques for Strong Adhesion
Scuffing and sanding are crucial when it comes to redoing your cabinets. Ever wondered why your paint just doesn’t stick? Here’s the scoop: using medium-grit sandpaper, ideally between 100-150 grit, can make a world of difference.
When you scuff the surface, you’re creating a texture that allows the paint to grab on better. It’s all about getting rid of that shiny finish that usually acts as a barrier. Think about it—if the surface is slick, paint won’t adhere well.
As you sand, focus only on the areas you’re painting. Use consistent pressure; this keeps the surface even and avoids any weird low spots. It might feel tedious, but it’s worth it. And don’t forget to clean up afterward! A damp cloth or tack cloth works wonders to wipe away the dust and debris left behind. A clean surface is critical before you apply your primer.
By following these simple steps, you’re setting yourself up for success. The primer will bond much better, leading to a smoother finish and lasting results. Trust me, this prep work can help your new paint job hold up over time. Wearing an appropriate disposable dust mask while sanding is important to protect yourself from hazardous dust particles.
Recommended Products

PROFESSIONAL 11 INCH SIZE – 11 inch sanding discs designed for wide surface coverage and steady control during dry sanding and finishing work. Compatible with many orbital disc sander tools and orbital sander pads used in workshops and repair environments. Ideal for countertops, marine parts, and repair tasks using 11 inch orbital sanding discs, orbital sander sandpaper, circular sander pads, circular sander sandpaper, sanding pad systems, and power sanding discs.

Usage: works with an assortment of belt sanding machines and applications – providing a heavy duty stripping and sanding tool for wood, aluminum, fiberglass, rubber, plastic and non-ferrous metals

【TELESCOPIC DESIGN & LIGHT WEIGHT】This drywall tools is collapsible. This design will save your space and make it easy to carry and store in the carry bag. The retractable extension rod allow this ceiling sander to extend from 3.9 feet to 5.5 feet to accommodate different working heights and simplify your popcorn ceiling removal vacuum work. This electric sander is only 8.59 pounds, and the total weight of Sander+ Rod+ Dust Hose+ Dust Collection Bag is only 10 pounds, both are much lighter than other electric dry wall sander on the market
Understanding Different Primer Types for Cabinets
Choosing the right primer for cabinets makes a real difference in how that paint job turns out. So, what should you keep in mind when picking a primer?
- High-Quality Primer: Check out options like Benjamin Moore’s Fresh Start Primer. This type really promotes adhesion and can help with minimizing stains, so you can have a better paint application at the end of the day.
- Bonding Primers: If you’re dealing with existing painted surfaces or shiny finishes, bonding primers are where it’s at. They create a strong grip that gives your paint a better chance of sticking around.
- Stain-Blocking Primers: Got stubborn stains on those cabinets? A stain-blocking primer can seal those odors and give you a smooth finish.
It’s worth noting that lacquer-based primers can cause more trouble than they’re worth, leading to peeling or chipping. And don’t forget! Allow at least an hour for your primer to dry before rolling on that paint; this one step can really help you achieve a durable finish.
Using sanding discs with a 400 grit level after priming can ensure a smooth surface and optimal paint adhesion.
In the end, taking the time to choose the right primer can set you up for success. Have you ever had a tough time getting paint to stick?
Recommended Products

Premium Epoxy: Our wood repair kit is a smooth, creamy 2-part epoxy finishing paste compound that's compatible with most water/solvent-based primers and paints

4" double reinforced for strength

Superior Adhesion: Everbond RV Roof Primer ensures exceptional adhesion, creating a solid foundation for your roof coating and preventing peeling or flaking.
Frequently Asked Questions
How to Prep Painted Cabinets for Repaint?
To prep painted cabinets for repaint, we’ll gather safety gear and prep tools, repair dents, choose primer options, apply our paint types, and master painting techniques. Finally, we’ll consider drying times and add the final touches.
Can I Just Paint Over Old Paint on Cabinets?
We can’t just paint over old paint on cabinets. Proper surface preparation is key for paint adhesion. With the right sanding techniques and primer, we guarantee durability and a beautiful finish that complements our color selection.
Do You Need to Scuff Cabinets Before Painting?
Yes, we need to scuff kitchen cabinets before painting. Using proper scuffing techniques and the right sanding materials improves paint adhesion, ensuring a smooth finish and preventing common repainting mistakes. Let’s get started with surface preparation!
How to Clean Painted Cabinets Before Repainting?
To clean painted cabinets, we’ll use eco-friendly cleaners and gentle grease removers while avoiding damage. Let’s focus on effective cabinet cleaning tips, proper cleaning tools, and best practices for ensuring ideal surface preparation before repainting.


