As an Amazon Associate, we earn from qualifying purchases. Some links on this site are affiliate links at no extra cost to you. Our recommendations are based on thorough research and editorial judgment.

How to Remove Plastic Sheeting Without Spreading Dust Everywhere
Removing plastic sheeting can feel daunting, especially when you’re worried about sending dust flying everywhere. It’s a common problem many face during renovation or cleanup projects.
So how do you tackle this without turning your space into a dust storm?
Start by bringing in some fresh air. Crack open a few windows and set up a box fan to blow that stale air out. This simple step makes a big difference in reducing dust build-up.
When you’re ready to peel back the plastic, make sure you’ve got a damp cloth handy. Wiping down the edges first is a slick trick to catch any dust particles before you even start.
Then, gently peel back the sheet, taking your time to avoid any sudden movements that might scatter debris.
This might sound tedious, but as you roll the sheeting inward, it actually contains dust rather well.
Once it’s all wrapped up, toss it into a sealed bag for disposal. Keeping a vacuum close by can also help. Just fire it up to catch any bits of dust that escape while you’re working.
Taking these steps can save you from a huge mess. Want your cleanup process to be as smooth as possible? It’s worth the extra effort to minimize dust now rather than deal with it later!
What techniques have you found useful when tackling similar projects?
Key Takeaways
- Open windows for ventilation to help dilute airborne dust while removing plastic sheeting.
- Wipe down the edges of the sheeting with a damp cloth before removal to trap dust.
- Peel back the plastic slowly, section by section, to minimize dust disturbance.
- Roll the sheeting inward as you remove it to contain and prevent dust from escaping.
- Use a HEPA vacuum nearby to capture any dust particles that may escape during removal.
Effective Techniques for Dust-Free Plastic Sheeting Removal

Removing plastic sheeting can feel like opening a can of worms—dust seems to go everywhere! To keep your space as dust-free as possible during this process, consider these practical techniques.
First off, ventilation is key. Open up those windows and doors. Fresh air can work wonders in minimizing airborne particles. The more airflow you have, the better.
Another easy step? Grab a damp cloth and wipe down the edges of the plastic. This helps capture any dust that might be clinging on tight before you even start peeling the sheeting away. It only takes a moment, but it makes a difference.
When it comes time to actually remove the sheeting, take your time and peel it back slowly. If you rush, you might accidentally send dust flying everywhere, and nobody wants that. It’s a delicate balance; you want to be careful but also efficient.
As you take the plastic down, try to roll it inward. This technique keeps all that accumulated dust contained within the sheeting itself. It’s like wrapping a gift—you’re just holding it all in!
Lastly, make sure to dispose of the plastic properly. Store or toss it in a sealed bag to keep any loose dust from escaping back into the room. Using water-based sealants can help reduce dust accumulation on surfaces in preparation for future projects.
Identifying Dust Risks Associated With Sheeting Removal

Removing plastic sheeting can really stir up some dust, and it’s something you need to keep in mind. When that settled dust gets disturbed, all those tiny particles can fly around, causing problems for days. Microplastics and construction dust can really mess with your respiratory system and allergies.
So, what’s the trick? Instead of yanking or shaking the sheeting, which can kick up a storm of dust, try handling it gently. Caution is your best friend here.
Don’t forget your protective gear! Wearing a dust mask and protective eyewear is a must. You want to keep those harmful particles at bay while you work.
Before you even think about removing the sheeting, take a moment to clean the area. A damp cloth or a vacuum with a HEPA filter can make a big difference by trapping those particles and lowering dust levels.
Choosing a NIOSH-approved mask with proper filtration efficiency will help protect your respiratory health during the removal process.
Honestly, taking these simple steps can help make the removal process a lot safer. So, why not give it a shot the next time you’re tackling a project? Staying mindful about dust can really pay off.
Essential Tools for Safe and Efficient Sheeting Removal

Removing plastic sheeting can stir up quite a bit of dust. If you want to keep the mess to a minimum, you’ll need the right tools for the job.
Gloves: First off, make sure you’re protecting your hands. Wearing gloves while handling the sheeting can help prevent skin irritation and keep contaminants at bay.
HEPA Vacuum: Got a HEPA vacuum? Keep it handy. It’s a must-have for sucking up any dust particles that might escape during removal—clean air is the goal here.
Ventilation: Don’t forget about good airflow! Make your space as breezy as possible by opening windows or using fans to help disperse any airborne dust that tries to linger.
Technique: When it comes to the actual removal of the plastic sheeting, roll it down from the top. This little trick can really help contain the dust and stops it from scattering everywhere.
For extended projects, consider regular use of rust proofing sprays to protect any exposed metal surfaces from moisture and corrosion during the cleanup.
Recommended Products

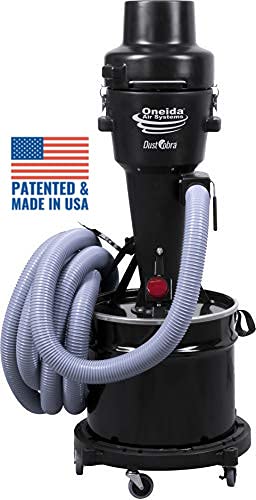
10X HIGHER SUCTION POWER than standard dust collectors and the only dust collection system on the market with high enough levels of static pressure (WC) and airflow (CFM) to effectively capture and contain dust from every tool in the shop with a dust port size of 1” to 5”. BEST DUST COLLECTOR – Popular Mechanics 2020 Tool Awards

BIG 58”w, 28"d, 28"h work area! Overall abrasive blast cabinet size: 60”w, 30"d, 64-1/2"h. FULLY ASSEMBLED!

Step-by-Step Instructions for Removing Plastic Sheeting Minimizing Dust
Removing plastic sheeting can be a real hassle, especially when you’re trying to avoid a dust storm in your home. Lots of folks forget how much dust can cling to that stuff, so it’s smart to tackle this task with a few simple steps that keep the air cleaner.
First off, you’ll want to start by loosening the edges carefully. Ripping it off can send dust flying everywhere, and nobody wants that kind of mess. If you have painter’s tape handy, use it to secure the edges to the floor or walls; it’ll make the removal smoother and cleaner.
As you go through the process, consider keeping a damp microfiber cloth nearby. It’s helpful to wipe the surface of the plastic while rolling it up — this way, you’re trapping the dust instead of letting it escape into the air. Gradually peeling back the sheeting section by section is a solid tactic. This gives any disturbed dust a chance to settle, making your space feel less chaotic.
Don’t forget about ventilation. A well-ventilated area can help disperse dust, but make sure there aren’t any drafts stirring things up. You don’t want to end up creating a wind tunnel for dust!
If possible, selecting thicker sheeting like the 6 mil options can reduce the amount of dust that clings and tearing during removal, due to its enhanced durability and tear resistance.
Recommended Products

PROTECTIVE BARRIER: This is the ideal cover for heavy equipment and machinery; it acts as a protective barrier from dust, vapor, moisture, paint and more.

Common Challenges When Removing Plastic Sheeting and Solutions
Ever tried removing plastic sheeting only to find it creates a mountain of dust? It’s frustrating, right? But with a few simple strategies, you can make this messy job a lot easier.
First off, try peeling back the sheeting slowly. This helps minimize dust particles flying everywhere. You don’t want to go for a big yank and suddenly feel like you’ve opened Pandora’s box!
When tackling those pesky fine dust particles, here’s the trick: grab some dampened microfiber cloths. They work wonders on the edges of the sheeting, trapping the dust before it has a chance to spread. It’s amazing how something so simple can make a difference.
Good ventilation is crucial, too. Think about opening windows or using fans to direct the dust away from areas you want to keep clean. If dust starts swirling around, you might as well have a dust storm in your living room!
Don’t forget about having a vacuum handy, especially one with a HEPA filter. It’ll catch any dust that escapes during the removal process. Just keep it close, so you can clean up as you go.
Now, for an extra tip: use painter’s tape around the perimeter of the sheeting. Not only does it help contain the dust, but it also creates a barrier that makes the space feel more secure while you work.
Also, selecting the right drop cloth with tear-resistant material can prevent rips that release dust and debris during removal.
In the end, removing plastic sheeting doesn’t have to be a total headache. With some planning, you can tackle those dust challenges head-on. When you think about it, what’s the best strategy you’ve found for minimizing dust during projects like this?
Recommended Products

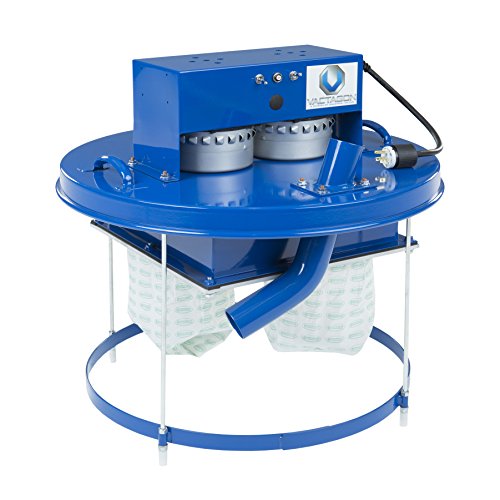
Our largest Dust Collector features a whopping 4029 CFM capacity and can handle any large duct system with a static pressure loss less than 16
Delivers up to 245 Actual CFM @ 23" WC - ideal for handheld and bench-top tools

Industrial strength HEPA vacuum for residential use.
Strategic Post-Removal Cleaning to Eliminate Dust
Removing plastic sheeting can feel like a victory, but don’t let your guard down just yet. If you want that dust-free environment to stick around, the cleaning you do right afterward is crucial. Here are some straightforward tips to make sure your space stays clear of dust:
Start by grabbing some damp microfiber cloths. Wipe down all the surfaces before and after you pull off that plastic sheeting. This tactic really helps trap those pesky fine dust particles, which means they won’t have a chance to settle back on your freshly cleaned areas.
Next, it’s time to vacuum. Make sure you’ve got a good vacuum with a HEPA filter to catch any leftover dust and debris. Trust me, this will prevent you from sending dust swirling back into the air. It’s a small step that makes a big difference.
After vacuuming, don’t skip the mopping. Give all hard surfaces a thorough damp mopping to ensure you’ve wiped away any remaining dust. When it comes to carpets and rugs, take a moment to give them a final vacuum too. It’s easy to overlook these areas, but they can be major dust collectors.
So, why does all this matter? A clean space not only looks good but feels good too, helping to reduce allergens and improving indoor air quality. Plus, there’s something satisfying about knowing your home is truly clean.
In short, tackle that dust with a combo of damp cloths, a solid vacuum, and a good mop, and you’ll keep your space looking and feeling fresh. Using disposable boot covers during removal can also help minimize tracking dust back inside. What’s your top tip for post-renovation cleaning?
Recommended Products
TURN A 55 GALLON DRUM INTO THE BEST VACUUM YOU’ll EVER OWN

Powerful cleaning: Bagged canister vacuum cleaner for all types of floors, with an improved Power Efficiency Motor and high suction of 1200 watts, to efficiently eliminate dust from your home
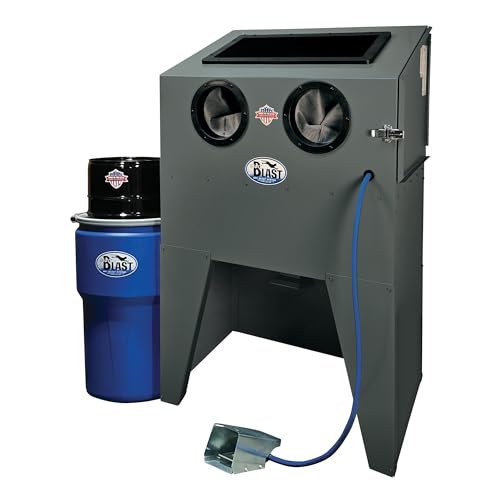
34”w, 22"d, 20-1/2"h work area! Overall abrasive blast cabinet size: 36”w, 23"d, 54-1/4"h. FULLY ASSEMBLED!
Understanding Dust Settling: Timing Your Cleanup?
Have you ever tackled cleanup after a home renovation only to find the dust just keeps coming? It’s a common issue that many don’t think about—when is the right time to start cleaning? After construction, it’s smart to wait at least 48 hours for dust to settle before diving into your cleaning routine. That fine dust tends to hang around in the air before finally settling on your surfaces.
To really nail down your dust management, keep an eye on a couple of things. First, check how your indoor air quality feels—like, can you see the dust floating around? You want to plan your cleanup once most of that nasty dust has found its way back down. And don’t be shy about scheduling several cleaning sessions; it often takes more than one go to catch all those sneaky particles.
Truth is, jumping in too soon can stir up settled dust and make your indoor air quality worse. By waiting and timing your cleanup right, you’ll be able to remove dust more thoroughly, making your home feel a whole lot cleaner. Using products with low VOC levels can also help maintain better indoor air quality during cleanup efforts. So next time you finish a project, just remember: good things come to those who wait—at least when it comes to dust! How do you usually approach cleanup after construction?
Preventing Future Dust Intrusion After Sheeting Removal
Removing plastic sheeting can leave your home feeling a bit vulnerable to dust. So, how do you keep it from creeping back in? Here are some practical steps to create a dust-free environment after your renovation.
First off, grab a vacuum with a brush attachment that has a HEPA filter. This is a handy way to get rid of those pesky fine particles that might be lingering around. A good vacuum can really make a difference.
Sealing up any gaps around windows and doors is another smart move. Weatherstripping or caulk can work wonders to minimize dust sneaking in. You might be surprised at how even the smallest cracks can let dust invade your space.
For your air quality, don’t forget to clean those air vents regularly and change out your HVAC filters. Keeping clean air circulating is key, and it helps trap dust before it even gets a chance to settle.
Try making it a habit to put down entry mats at all your doorways. It’s a simple step that can greatly reduce how much dust gets tracked into your home. Plus, you’ll appreciate the fresh feel of your clean floors.
Another tip? Consider investing in air purifiers with HEPA filters. These ongoing additions to your home can continuously improve air quality and help keep dust at bay.
You can also explore low-odor, water-based options when selecting products for cleanup to further enhance indoor air quality and reduce airborne irritants.
Optimal Ventilation Strategies During Plastic Sheeting Removal
Removing plastic sheeting can feel like an overwhelming task, especially when dust is in the mix. Ever wonder what the best way to keep that dust from messing up your space is? Catching those airborne particles starts with good ventilation.
Try this: First off, open those windows. Letting fresh air in helps move around and dilute the dust that wants to hang out in your home. Setting up a box fan at an open window creates a sort of vacuum effect, pushing stale air and dust outside. It’s a simple trick that can make a big difference.
Don’t forget about an air purifier with a HEPA filter. This little powerhouse captures those fine dust particles that just love to float around. While you’re at it, be deliberate and slow when pulling down that plastic sheeting. Quick movements can kick up a cloud of dust, and that’s the last thing you want.
Once you’ve finished removing the sheeting, let the space breathe for about 15 minutes. This gives any remaining airborne dust a chance to settle down. Then, you can dive right into your cleaning routine without a dust cloud following you.
Taking these steps helps you maintain a cleaner environment during plastic sheeting removal. For added protection in noise-sensitive environments, consider using acoustic sealants to minimize sound and dust infiltration.
What other tips have you heard to keep a space dust-free?
Recommended Products

Advanced HyperHEPA Filtration: Designed to remove and trap 99.995% of all airborne particles down to 0.003 microns, the Atem X supplies unequaled protection against dust, pollen, pet dander, smoke from wildfires, and more. True HEPA filtration

3-Stage Filtration System: AlorAir Cleanshield HEPA 550 Air Scrubber build with Airflow 270-550 CFM with Variable Speed as a portable HEPA air purifier. It can be used with up to 3 levels of filtration, pre-filters, activated carbon/HEPA filters.

Multiple Filtration - DecDust V1 Air scrubber with 2-in-1 filter system, used with pre-filter, HEPA filter which captures 99.97% of 0.3-micron airborne particles such as smoke, pet dander, wood chips, and debris allergens, etc. Heavy-duty air scrubbers are ideal for use in large commercial spaces to improve air quality.
Frequently Asked Questions
How to Stop Plastic From Attracting Dust?
To stop plastic from attracting dust, we should use anti-static spray, regularly clean with a microfiber cloth, maintain indoor humidity, and consider air purifiers. Furniture polish or dust-resistant coatings can help too.
How to Get Rid of Dust Without It Going Everywhere?
Ever wonder how to tackle that relentless dust swirling around our homes? With effective dust control techniques, smart room organization, and regular cleaning schedules, we can improve indoor air quality and manage allergens effortlessly—let’s get started!
What Repels Dust on Plastic?
We can repel dust from plastic by using anti-static sprays, microfiber cloths, and maintaining indoor humidity. Implementing cleaning routines with surface coatings and air purifiers enhances ionizers’ effectiveness, creating a less static-friendly environment.
What Is Grandmas’ Simple Trick to Eliminate Dust?
Let’s embrace a fresher breath of air! Grandma’s simple trick for dust reduction involves a homemade dust spray—equal parts water and vinegar—paired with microfiber cloths for effective dust traps and eco-friendly surface treatment methods. Let’s breathe easy!


