As an Amazon Associate, we earn from qualifying purchases. Some links on this site are affiliate links at no extra cost to you. Our recommendations are based on thorough research and editorial judgment.
How to Build a Simple Plastic Dust Barrier (Doorway Zip-Wall Method)
Ever tried to contain dust during a home project? It can feel like a losing battle, especially when you’re working in tight spaces. A simple plastic dust barrier might just be the solution you need. The ZipWall method is straightforward and effective, so let’s dive into how to set it up.
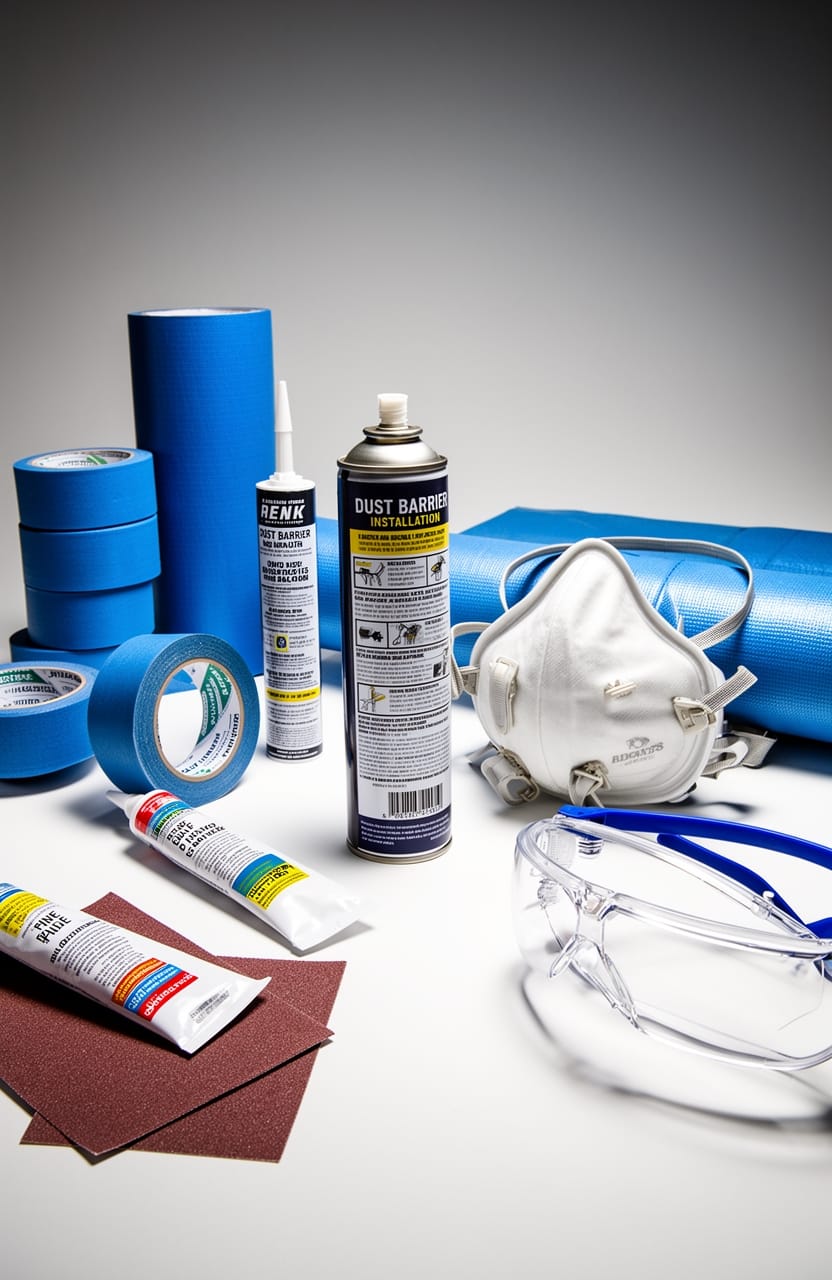
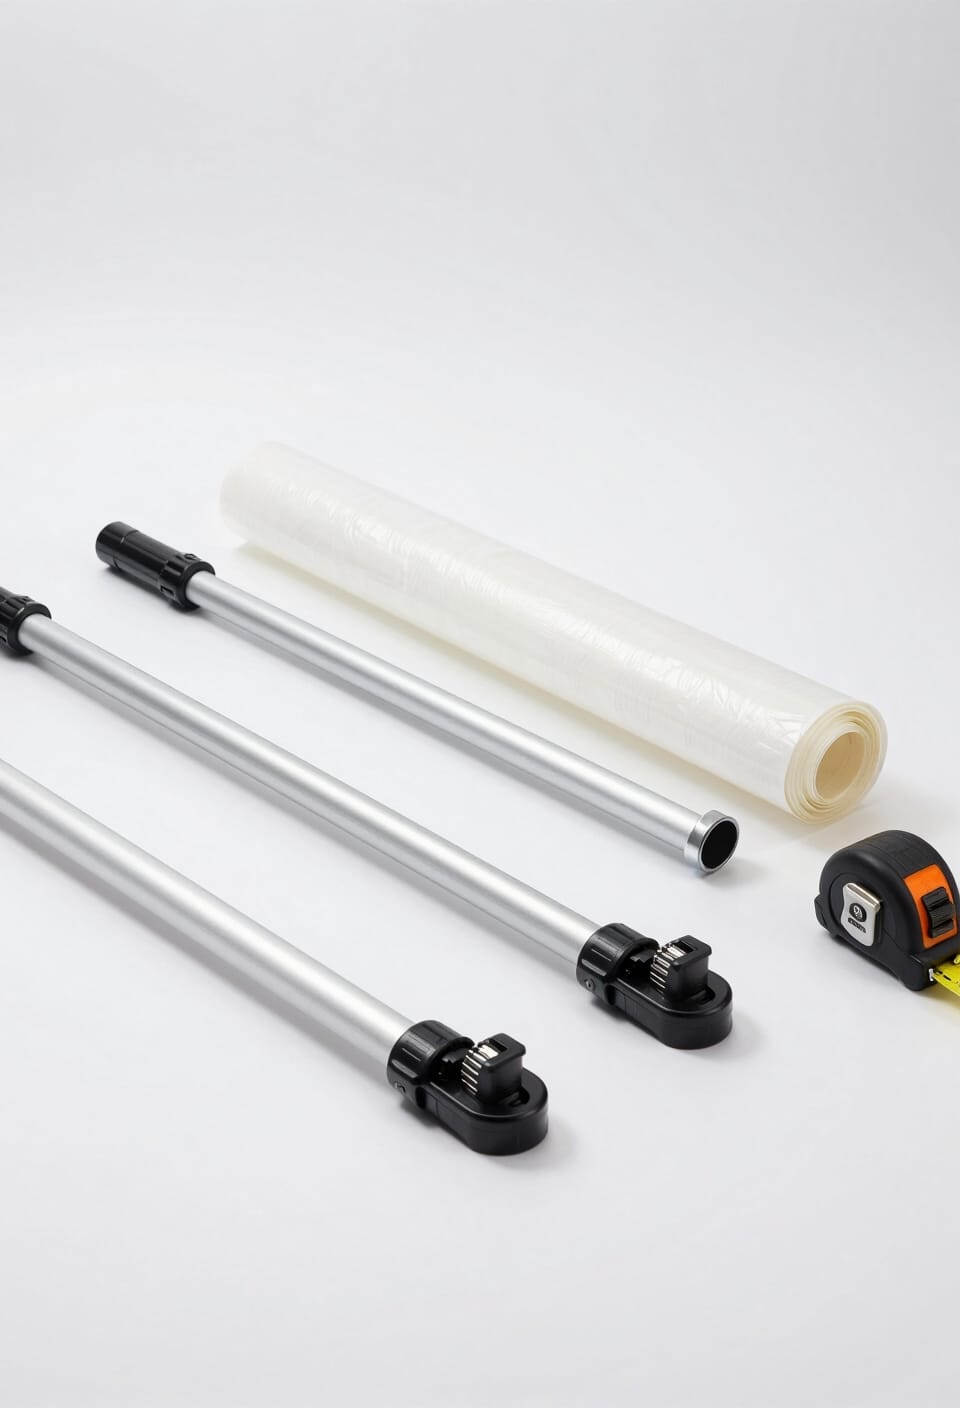
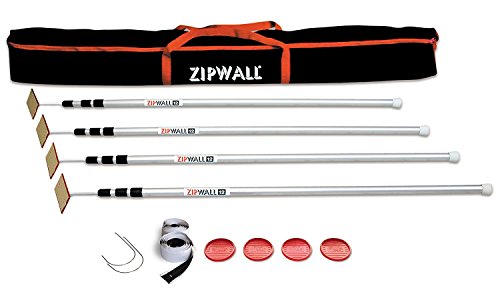
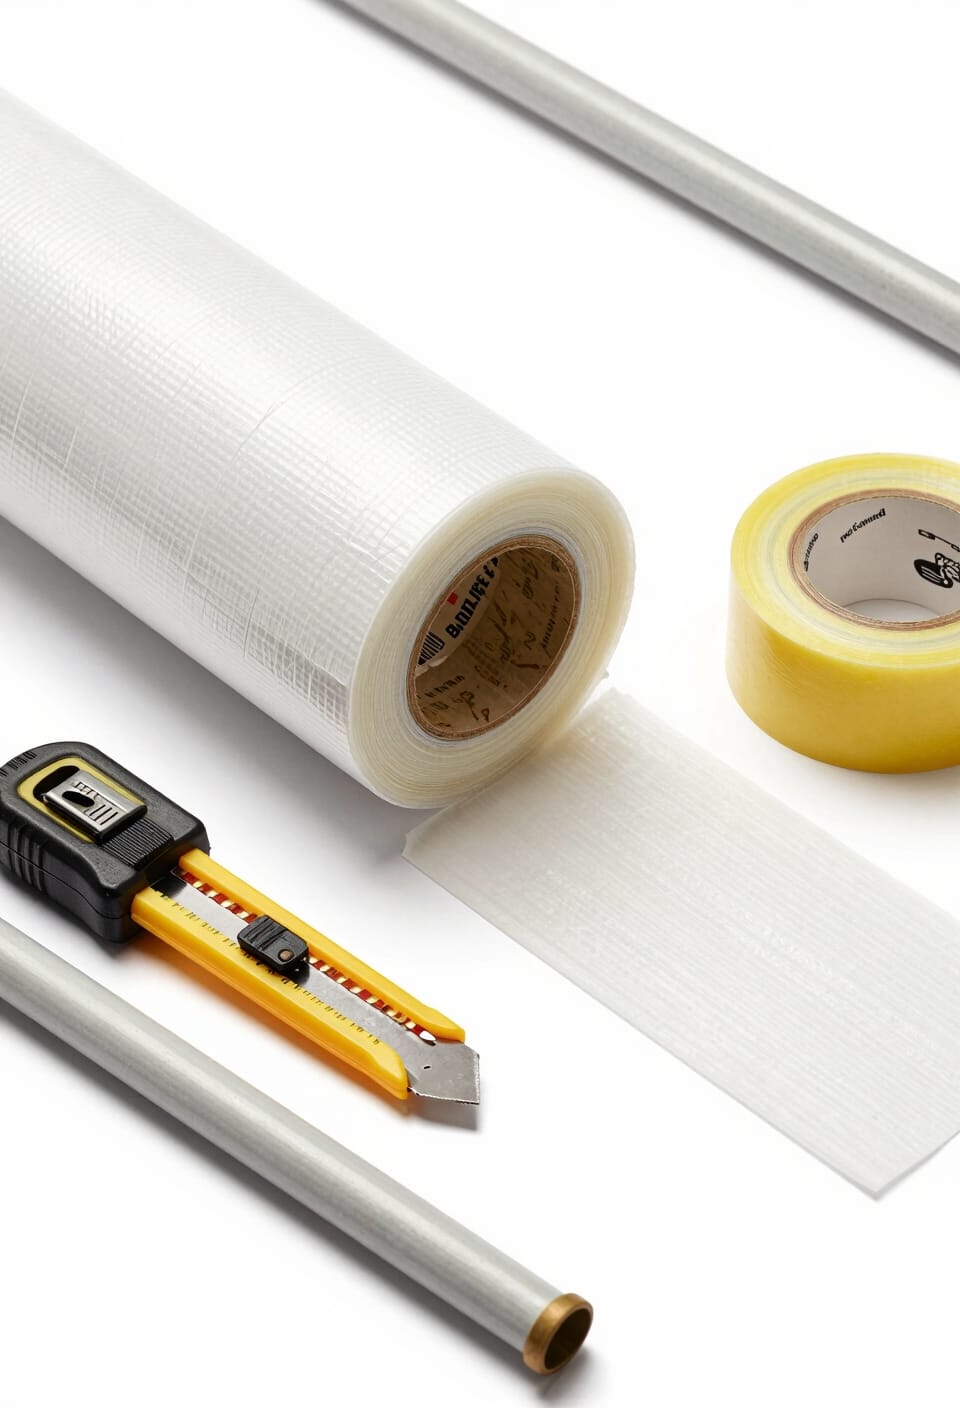
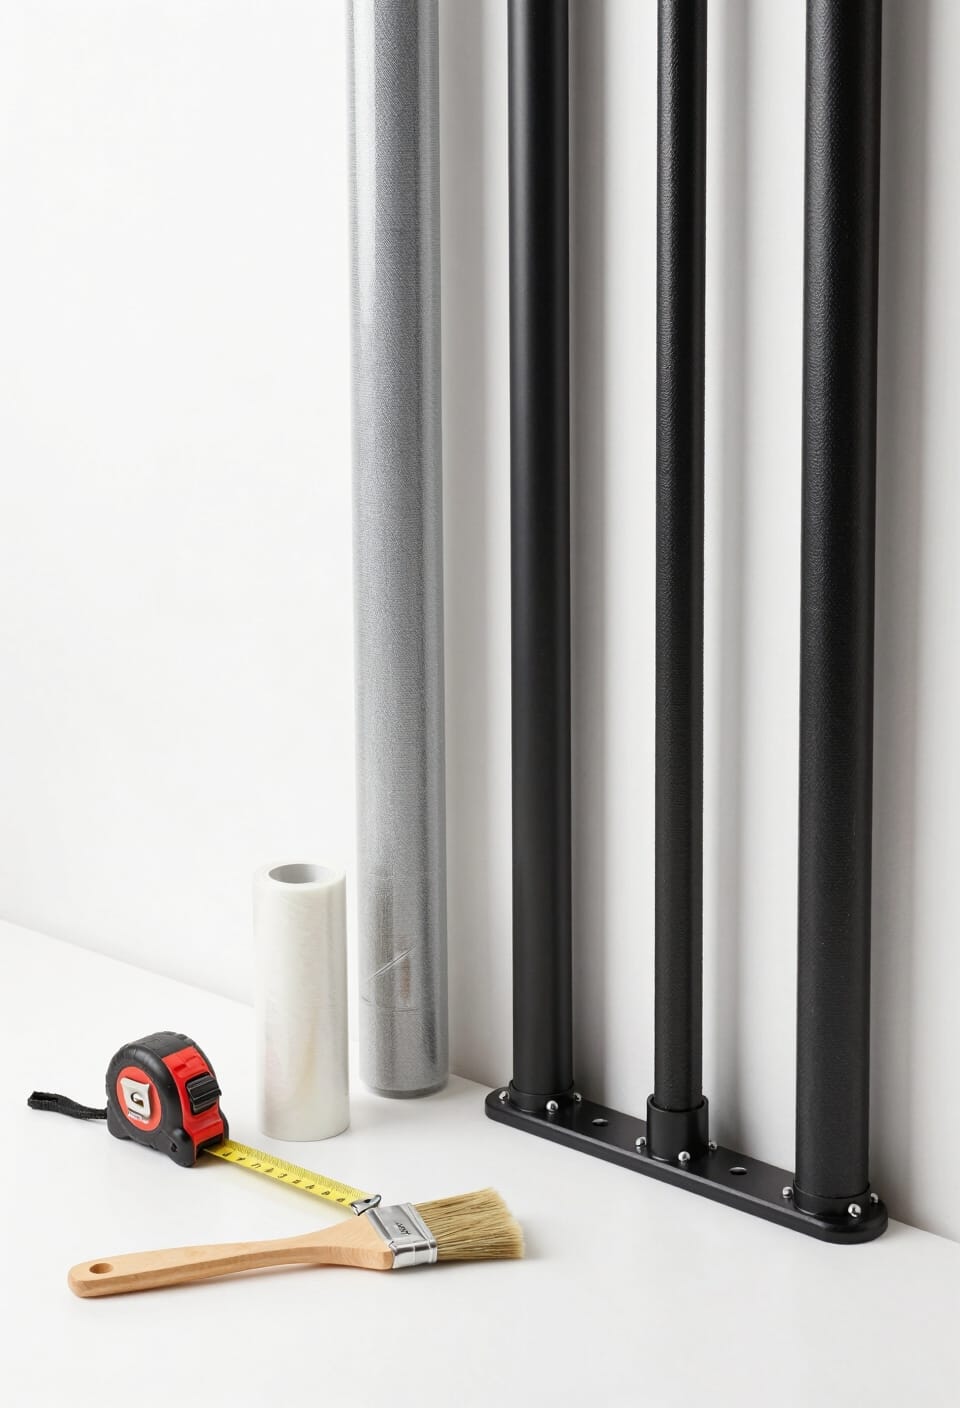
First off, you’ll want to gather a few essential items: ZipWall poles that can extend up to 12 feet, some 3 mil thick white plastic sheeting tailored to your doorway size, and GRIP DISK™ pads to keep everything secure.
The process kicks off by attaching the headpiece with zippers to the poles. Next, extend the poles until they reach the ceiling—make sure to lock them in place to keep things sturdy.
Now, here’s the trick: tuck that plastic tightly beneath the poles to really contain the dust. You don’t want any gaps that could let the mess escape into other parts of your home. It’s all about creating a tight seal.
So, why does this matter? Dust can be a real nuisance, not just for cleanup but for health reasons, too. Keeping it contained means a cleaner space and better air quality for you and your loved ones.
After you’ve got everything set up, you might want to think about some maintenance tips, like checking for any tears in the plastic or ensuring the poles stay secured. The best part is, once you get the hang of it, this whole setup becomes quick and easy.
In summary, creating a dust barrier with the ZipWall method is simple and effective. Have you tried it for your projects? It could be just what you need to keep the mess at bay.
Key Takeaways
- Secure a ZipWall door kit with zippers and durable tape to create the barrier frame.
- Attach the headpiece to ZipWall poles and lock the plastic sheet in place.
- Extend poles to the ceiling, twisting clockwise to secure them firmly.
- Pull the plastic sheet tight and tuck the bottom edge under each pole for a sealed barrier.
- Use 3 mil thick plastic for effective dust containment and durability during installation.
Why Use the ZipWall System for Your Dust Barrier?
Have you ever dealt with a renovation project that left your home covered in dust? It’s a hassle, but the ZipWall system can help you tackle that problem effectively. Here are some genuine reasons to consider it for your next job:
Setting up is a breeze. The lightweight, spring-loaded poles stretch up to 12 feet, so you can get your barriers up in no time. You won’t spend hours wrestling with cumbersome materials.
One of the standout features is the preinstalled zippers. Ever tried to access a work area without disrupting the dust seal? It’s a pain. With ZipWall, you can zip in and out as needed without letting the dust escape.
The durability of the materials is impressive too. The 3 mil thick plastic sheets are tough enough to handle the demands of construction or renovation. No more worrying about fragile materials that won’t hold up.
Forget about tape. The modular design means you won’t be stuck peeling it off surfaces later. This saves you time and effort, plus it preserves your walls and corners from damage—a major win.
If you’re conscious about waste, this system has you covered. You can use reusable nylon fabric sheets, which are a great eco-friendly option compared to single-use barriers. It’s a smart choice that’s good for both your wallet and the planet.
Additionally, enhancing your workspace with weather stripping can further prevent dust and drafts, creating a cleaner and more efficient environment.
The ZipWall system offers real efficiency and reliability for dust containment in your projects. So, have you considered making the switch to something that simplifies your cleanup efforts?
Recommended Products

Ready to meet any dust barrier challenge
Build a dust barrier in minutes without tape, ladders or damage
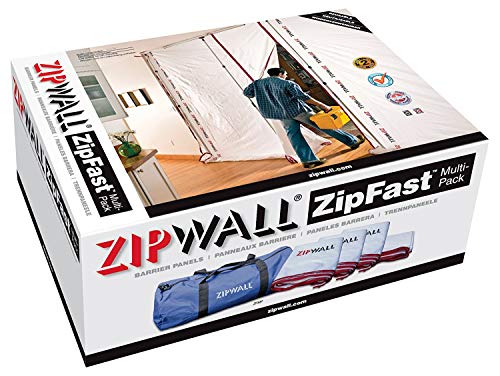
Pays for itself in fewer than 7 uses – greener and more economical than plastic sheeting
What You’ll Need for Your Dust Barrier Setup
Setting up a dust barrier can be a bit of a pain, especially if you’re not sure what you need. Here’s how to tackle it without breaking a sweat.
Start with ZipWall poles. These handy poles work great with standard plastic sheeting and come in lots of sizes. They really make the setup easier.
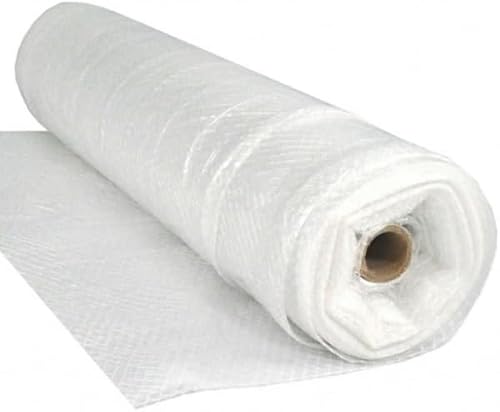
Next, grab some mil plastic sheeting. I recommend going for a roll of 3 mil thick white plastic, about 10 x 50 feet. This size is ideal for covering larger areas without needing to fuss with multiple sheets.
Don’t forget the GRIP DISK™ pads. These little gadgets keep the poles stable, especially if your floors are smooth. Trust me, they make a big difference in preventing the poles from slipping.
You’ll also need scissors to cut the plastic sheeting to match your space. Make sure they’re sharp – it’ll save you a lot of time and frustration!
Lastly, consider using adhesive door kits. They come with zippers already installed and attach easily with two-sided tape. This makes getting in and out a breeze without letting dust escape.
For securing the plastic sheeting around doorways, a high-quality yellow painters tape is ideal due to its strong adhesion and residue-free removal, ensuring your barrier stays put without damaging surfaces.
Recommended Products

Build a dust barrier in minutes without tape, ladders or damage

Create a doorway in a plastic dust barrier quickly and easily

Seal any doorway in a minute; goes up fast with ZipWall double-sided tape
Step-by-Step ZipWall Installation of the Doorway Method
Got a messy project coming up? Whether you’re renovating or just trying to contain the dust from your latest DIY venture, installing the ZipWall doorway method can really make a difference. Let’s dive into how you can set this up with a few straightforward steps.
- Secure the ZipWall Kit: First things first, grab yourself a ZipWall door kit. It comes with zippers and durable two-sided tape, which makes sticking it to your doorway a breeze.
- Attach the Head Piece: Connect the head piece to the ZipWall poles, making sure to slide the edge of the plastic sheet between the head and plate. This locks everything into place securely.
- Extend the Poles: Time to get those poles up! Raise them until the plastic sheet touches the ceiling and twist clockwise to lock them in. You want them stable, so don’t rush this part.
- Adjust the Plastic Sheet: Here’s a key step: pull the plastic sheet tight. A sagging sheet won’t do you any favors. Tuck the bottom edge under each pole to create a clean seal. For best results, go with a plastic that’s at least 2 mil thick to keep that dust contained.
To further improve your workspace and protect your surfaces, consider using corrosion-resistant primers on any exposed metal parts in your project area.
You’ll be glad you took the time to set this up properly. Keeping your space clean is no small feat, but with the ZipWall, you’ve got a solid first line of defense against dust and debris. So, what’s your next project going to be?
Recommended Products

Create hands-free, self-closing access to your worksite that easily handles high traffic areas

FoamRail Cross Bars tightly seal along floors, ceilings or walls without ladders, tape or damage

Product 1: Dust Barrier In Minutes: These ZipWall spring-loaded poles are quick and easy to set up without ladders, tape, or damage, making them an ideal dust protection solution for both commercial and residential remodeling and restoration.
Best Tips for an Effective Dust Barrier
Have you ever tackled a renovation project and ended up with dust everywhere? It can be such a hassle. After you’ve installed the ZipWall doorway method, you want to make sure your dust barrier is rock solid throughout the job. Here are some tips to help you keep that dust contained.
First off, go for 3 mil thick plastic sheeting. Trust me, it’s durable and easy to work with during setup. When you’re starting, set your poles against a wall but keep the bottom of the plastic loose so you can easily adjust the tension when needed.
Deploy those poles fully by securing them against the ceiling. And don’t forget to collapse the top spring; it’ll give you that extra stability. The best part is you can keep adjusting if you need to.
To keep everything in place, use GRIP DISKs at the base of each pole. This is especially important on smooth floors where things can get slippery. You don’t want to be chasing after your dust barrier!
When it comes to sealing, tuck the disposable plastic sheeting under each pole after you’ve installed everything. That way, you can ensure a complete dust barrier.
Additionally, for long-lasting protection, consider applying a waterproof sealant on any gaps or edges to prevent dust and moisture from infiltrating.
With these tricks, you’ll have a sturdy setup that’ll help keep your space clean while you work. So, how are you going to protect your home from that dust?
Recommended Products

ECO FRIENDLY (100% BIODEGRADABLE): Made from cardboard, zero plastics were used in production of Sandbaggy Garden Paper. They're made right here in the USA!
PANDA FILM – Black and White Panda Film is a heavy-duty, waterproof poly film. Improve lighting efficiency in your greenhouse or grow room.

TOUGHEST 6 INCH STAPLES ON AMAZON: This 9 gauge staple breaks through the hardest and rockiest soil. Unlike our competitor’s thinner 11 gauge staples that bend in hard soils, these landscape staples will pierce through the hard soil and get the job done - saving you valuable time & frustration. Ain’t nobody got time for that
How to Fix Common ZipWall Setup Issues?
Common setup issues with ZipWall can really mess with your dust barrier. So, let’s tackle some of those pesky problems together.
First off, make sure to cut the plastic sheeting right. If it’s too big, it may sag and won’t fit neatly against the poles. A snug fit is crucial for keeping dust at bay.
Now, if your poles are feeling wobbly, here’s the trick: grab a GRIP DISK. It adds a bit of extra support, which is especially useful on smooth surfaces. Stability is key, after all.
When you’re setting it up, don’t pull everything too tight right away. Keep the bottom of the plastic loose at first. By holding off on fully compressing the top spring until all the poles are in place, you give yourself the flexibility for quick adjustments.
Take a moment to check your stability before tucking the plastic underneath each pole. It’s a simple step, but it minimizes those annoying dust leaks.
And don’t forget: regular maintenance and inspections can help prevent pretty much all of these setup failures. So, can you afford to skip that?
Also, consider the weight capacity of your setup materials to ensure they can safely support the barrier without risk of collapse.
Recommended Products


10 Mil String Reinforced Greenhouse Plastic Sheeting - Dura Skrim is a high strength, lightweight, and flexible string reinforced polyethylene plastic sheeting. Built to outperform the competition, Dura Skrim is constructed with a high-strength polyethylene film and heavy-duty scrim reinforcement, laminated together.
Maintaining Your Dust Barrier for Future Projects
Maintaining a dust barrier after your project is just as crucial as setting it up right. You want to ensure it’s ready for whatever comes next, don’t you? Here are some tips to keep it in top shape for future projects:
Start by inspecting your equipment regularly. After each use, take a moment to check the plastic sheeting and poles for any wear or damage. You don’t want to discover a tear right when you need it most.
Cleaning is another key step. A damp cloth can work wonders—just wipe off the dust and debris. This not only helps keep things tidy, but it also extends the life of your materials.
Storage matters, too. After you’re done, put the plastic sheeting and poles in a cool, dry spot, ideally tucked away in the carry bag. The goal is to prevent any deterioration over time.
And don’t forget about the poles. Before your next use, give those spring-loaded poles a test. Make sure they extend and retract smoothly. It’s a little check that can save you from headaches later.
Finally, think about cleanup. After every project, do a quick tidy-up around the dust barrier. This simple step can help avoid future contamination, making your next job even smoother.
Additionally, to maintain an effective setup, consider the dust collection efficiency of any sanding or construction tools you use in conjunction with your barrier to ensure optimal cleanliness on your worksite.
Frequently Asked Questions
What Thickness Plastic for Zipwall?
For our ZipWall projects, we recommend using 3 mil thick plastic types. This thickness offers the perfect balance for barrier dimensions: strength for durability while still being manageable for easy installation and secure attachment.
How to Create a Zip Wall?
As we envision a barrier transforming our space, we can start the zip wall installation by selecting appropriate plastic sheeting types, securing poles at desired heights, and ensuring zippers are easily accessible for seamless cleanup.
How to Install a Zipper on Plastic?
To install a zipper on plastic, we should choose the right zipper types and clean the area first. Next, we’ll use the included two-sided tape for secure adhesion and test the zipper for smooth operation.
Is Zipwall Reusable?
Absolutely, ZipWall’s reusable magic lies in its longevity! By practicing proper maintenance, we can guarantee our poles and components last through numerous projects, making our dust containment efforts both effective and eco-friendly. Let’s keep them rolling!


