As an Amazon Associate, we earn from qualifying purchases. Some links on this site are affiliate links at no extra cost to you. Our recommendations are based on thorough research and editorial judgment.
How to Mask Kitchen Cabinets to Avoid Overspray and Edge Buildup
Have you ever tried painting your kitchen cabinets only to end up with a mess of overspray and ugly edge buildup? It’s frustrating, right? But with a few straightforward steps, you can keep your painting project neat and professional-looking.
First, start by giving those surfaces a good cleaning. A degreaser like M1 works wonders to remove any grease or grime that could interfere with your paint. You want a clean canvas, after all.
Next, grab some painter’s tape. Press it firmly along the edges of the cabinets to create a solid barrier that will prevent any paint from bleeding through. Speaking of barriers, cover any large areas you don’t want painted with plastic sheeting or brown paper. It’s a simple tip that saves a lot of headaches later on.
Also, don’t forget to lay down drop cloths on the floor to catch any drips or spills. Trust me, your floors will thank you.
Now, let’s talk about airflow while you’re painting. You want to maintain a good flow by opening windows and using fans. It helps with drying time and keeps your workspace comfortable.
Before you finish up, here’s the trick to getting those clean lines: use a utility knife to score the edges of the tape before you pull it off. This little step can make a world of difference in the final look of your cabinets.
So, why does this matter? Taking the time to properly mask your kitchen cabinets can mean less cleanup and better results. Honestly, it’s worth the effort to avoid that annoying overspray.
In summary, keep surfaces clean, tape edges well, cover large areas, ensure good airflow, and score tape edges for a sharp finish. Are you ready to tackle that kitchen makeover?
Key Takeaways
- Use painter’s tape along cabinet edges and press it down firmly to prevent paint bleed-through.
- Cover large areas with 9-inch paper or plastic sheeting to manage overspray effectively.
- Apply a bead of caulk along tape edges for better sealing against paint seepage.
- Lay down drop cloths around the workspace to catch any unintended overspray.
- Regularly check and adjust masking materials to ensure they stay secure and effective during painting.
How to Clean Your Cabinets for Painting
Cleaning your cabinets is a critical part of prepping them for paint. You don’t want to skip this step—trust me! Start with M1 Degreaser & Deglosser. This stuff really gets rid of grease, dirt, and any old finishes lurking on those surfaces. If you want an extra cleaning boost, try using Krud Kutter along with a bit of Dawn dish soap.
When you apply these cleaners, grab a clean, non-shedding cloth and move in a circular motion. This will help prevent oversaturation, which can leave your cabinets too wet to paint. Now, here’s a tip: consider using liquid sandpaper, like Klean Strip. It helps strip away old paint and creates a surface that’s easier for the new paint to stick to.
After all that scrubbing, don’t forget to fill in any dents or gouges with bondo or wood filler. It’s those little imperfections that can show through the paint, and no one wants that! Remember, you’ll need to let everything dry thoroughly before you dive into painting. This is super important because any leftover moisture can really mess with the adhesion of your paint. Consider wearing protective goggles to keep your eyes safe from splashes and dust during the cleaning and prep process.
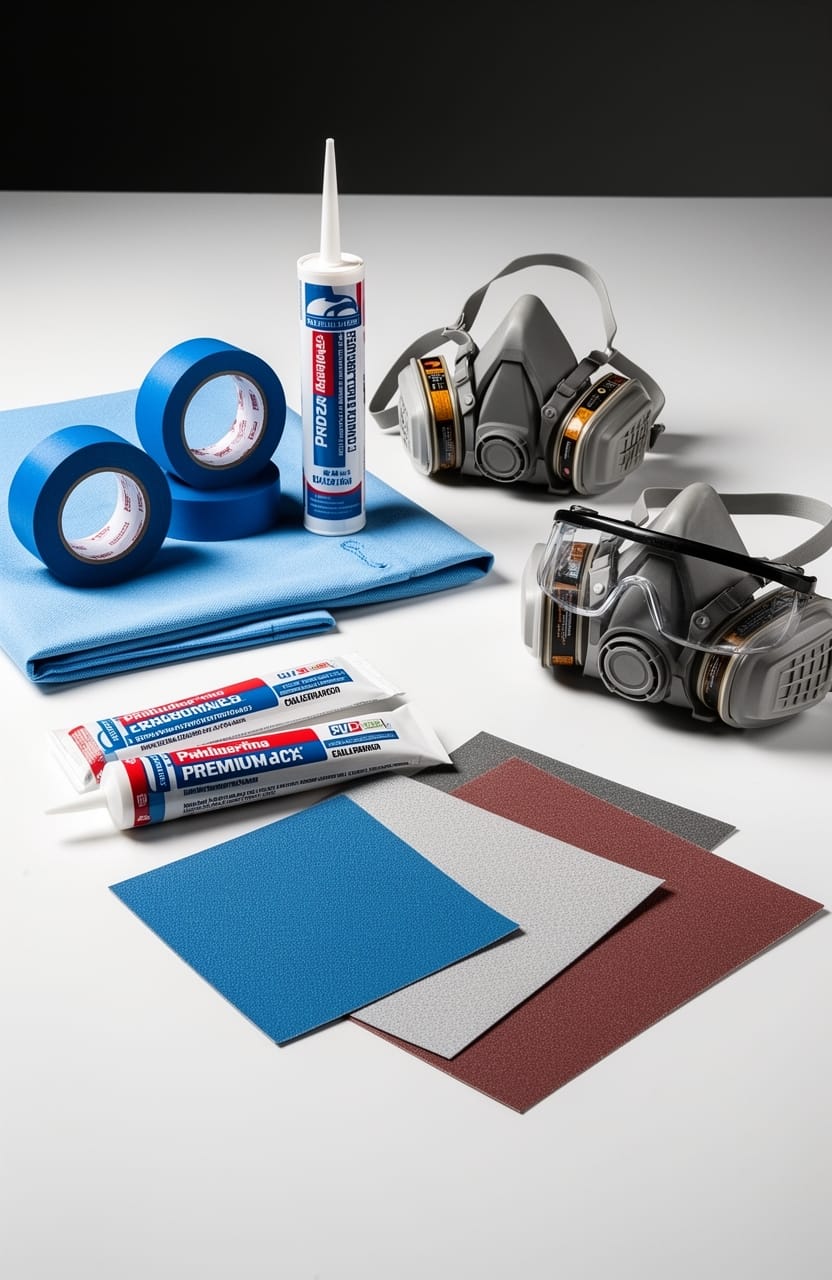
Must-Have Tools for Effective Cabinet Masking
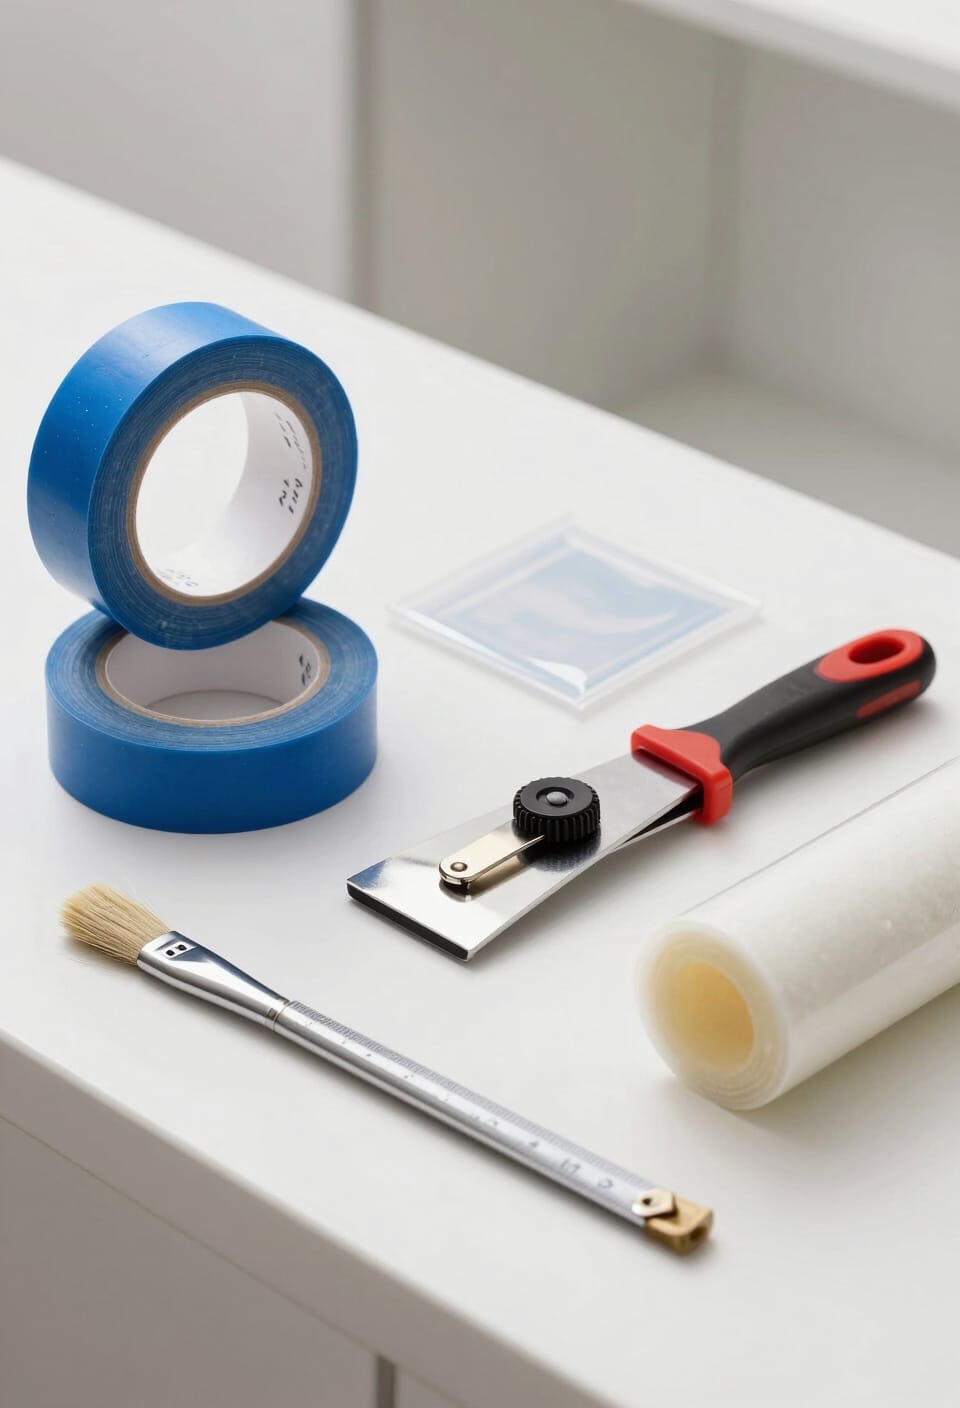
When it comes to painting kitchen cabinets, clean and sharp lines are the name of the game. But how do you achieve that crisp finish without losing your mind over messy paint edges? Let’s dive into the essential tools that’ll make your cabinet masking a whole lot easier.
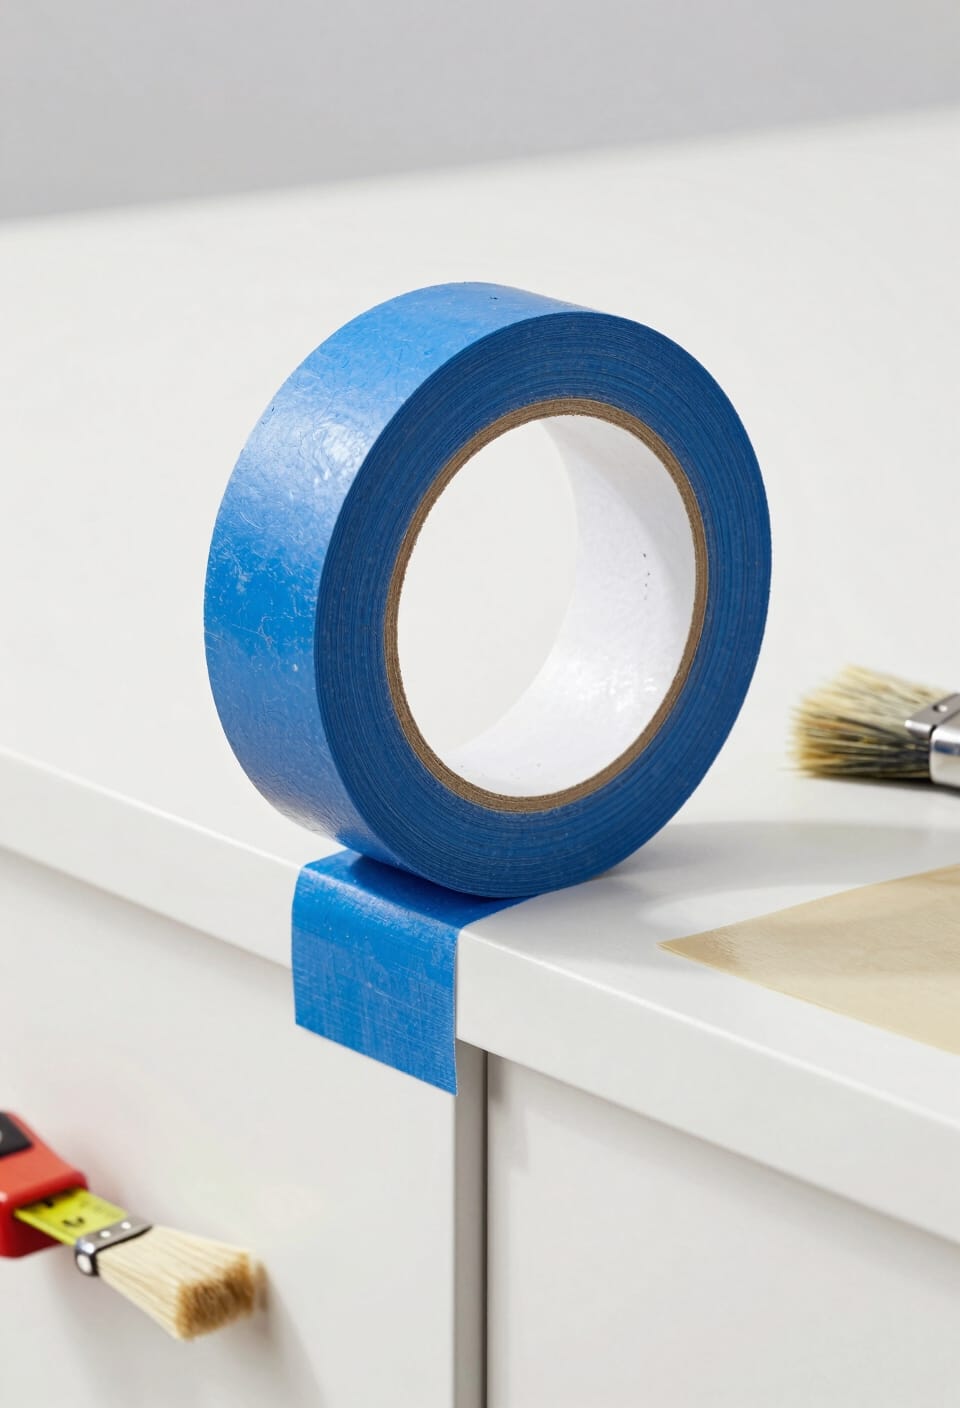
First up is Painter’s Tape. This isn’t just any tape; when you press it down firmly, it helps prevent that dreaded paint bleed-through. No one wants a messy line to ruin a fresh coat of paint, right?
Next, consider grabbing some 9-inch Paper or Plastic Sheeting. This stuff is perfect for covering large areas and keeping overspray at bay. Plus, it peels off easily after you’ve finished painting, making clean-up a breeze.
Another handy tool is the 3M Hand Masker. This tool can be a lifesaver, as it streamlines the process of taping edges. You get those clean lines with far less effort, so you can focus more on enjoying the painting process rather than stressing over the details.
If you’re dealing with intricate areas, try Liquid Masking Tape. It’s an awesome alternative to traditional tape for those tricky spots. It seals effectively without the hassle, giving you that professional touch without a ton of effort.
Ever think about doing an Adhesion Check? It’s worth doing! Regularly checking the adhesion of your masking materials helps maintain their effectiveness. Trust me, making sure everything’s sticking well will go a long way in keeping your paint lines neat.
Also, selecting a painter’s tape with medium adhesion strength ensures it sticks well without damaging your cabinet surfaces when removed.
Using these tools can really elevate the look of your cabinet painting project. So, what are you waiting for? Are you ready to get those cabinets looking fresh and fabulous?
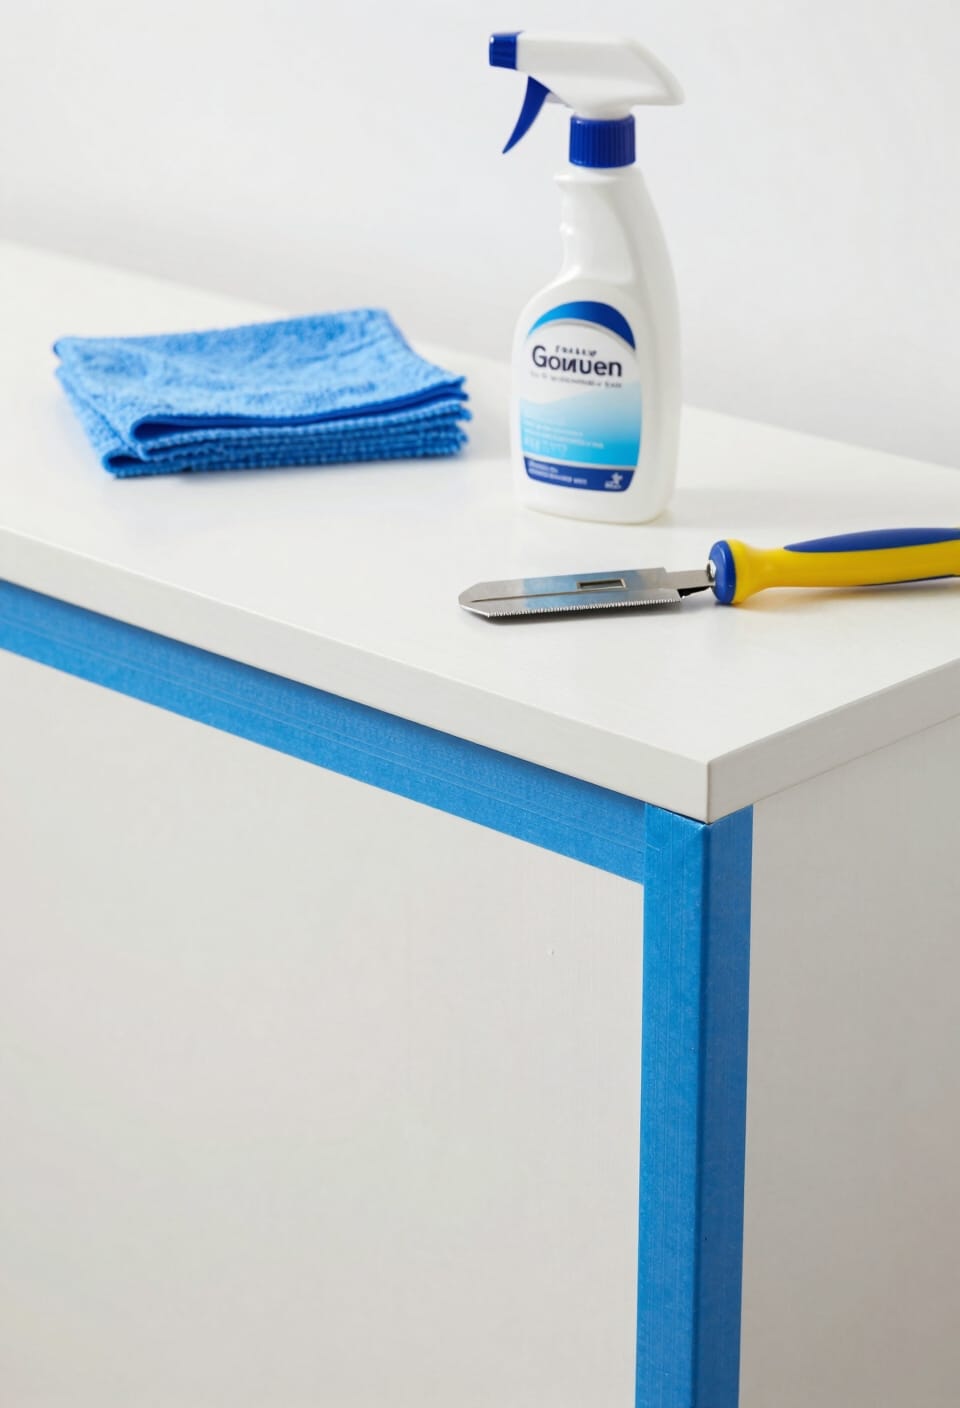
How to Secure Painter’s Tape Effectively
Painting your kitchen cabinets can feel like a daunting task, especially when it comes to getting those crisp, clean lines. Ever wondered how you can avoid those pesky paint bleeds? Securing painter’s tape the right way can really make a difference.
Start by pressing the tape down firmly along the edges. It’s a simple step, but trust me, it’ll save you a lot of touch-up work later on. If your cabinets have a more delicate finish, choose painter’s tape specifically designed for those surfaces. It’s less likely to lift the finish when you peel it off.
Corners can trip you up too, right? Here’s the trick: cut the tape at the corners with a utility knife. That way, you’ll get those sharp edges that really make a difference in the overall look. For an extra layer of protection, consider applying a bead of caulk along the edge of the tape and letting it dry for about 20 minutes. This gives you a better seal against seepage—nice, right?
Now, let’s talk about timing. When you’re ready to remove the tape, do it while the paint is still wet. This little tip helps prevent dried paint from pulling off with the tape, so you get smooth, defined lines every time. Additionally, using products that provide a non-greasy finish can help maintain clean edges and prevent unwanted buildup during your painting project.
How to Keep Your Workspace Well Ventilated
Maintaining good airflow while you paint is key for staying safe and comfortable, isn’t it? It’s easy to get caught up in the creative process and forget about the importance of ventilation. So, let’s dive into some practical tips to keep your workspace well ventilated:
First off, opening your windows and turning on fans can work wonders. This simple action creates cross-ventilation that helps disperse paint vapors and makes your air quality much better. You’ll feel the difference right away!
If you have exhaust fans or can snag a portable air purifier with a HEPA filter, definitely use them. They significantly reduce airborne particles which is a big win for your health. If you’re using fans, try rotating your ceiling fans or bringing in an oscillating fan to keep air moving around. This helps maintain a steady flow of fresh air.
When you’re painting in a tight space, take regular breaks outside. Seriously, stepping outside for a few minutes can really help you avoid inhaling all those paint vapors that can build up. Your lungs will thank you!
Thinking about extra protection? Wearing a respirator or mask that’s rated for organic vapors can be a smart move to protect yourself from airborne contaminants. It may feel a bit cumbersome at first, but it’s worth it when you’re deep into a project.
For best results consider using NIOSH-approved respirators that offer certified filtration efficiency to minimize exposure to hazardous paint particles and vapors.
Protecting Floors and Surrounding Areas
Are you gearing up for a kitchen project and worried about protecting your floors? It can be a real challenge to prevent paint overspray when you’re working on those cabinets. Trust me, you want to have the right materials on hand to keep everything safe.
To start, consider using the 3M Hand Masker. It’s great for carefully covering the edges of your flooring. That way, you not only protect the floors but also ensure you get those clean lines you’re after.
Another fantastic option is rosin paper. This stuff is perfect for guarding the entire area around your cabinets against both overspray and drips. You really do want to cover everything to avoid any messy surprises later.
When it comes to the cabinet doors and drawers, 9-inch paper is a reliable choice. You can mask those openings effectively, which keeps paint off them without making it challenging to access the interiors while you’re painting.
Creating a barrier is another smart move. Think about using a Zip Wall to seal off the area. It helps manage airflow, containing dust and preventing any paint particles from escaping.
Finally, for lifting those cabinet doors off the ground, I recommend paper cups or even coat hangers. It makes accessing everything much easier while reducing the risk of any accidental contact with your floors.
For the best results when masking, use blue painters tape which offers clean removal without residue and helps create sharp paint lines.
Now that you’re armed with these tips, you can tackle your kitchen project confidently. So, what protective measures will you take to shield your floors?
Best Practices for Managing Overspray in Cabinet Painting
Have you ever finished a painting project only to discover paint splatters on your freshly cleaned floors or countertops? Managing overspray during cabinet painting can be tricky but is totally manageable with the right approach. Let’s dive into some practical tips that can make a big difference.
First off, masking is key. Use painter’s tape around the edges of the cabinets—you’ll want to press it down firmly to avoid paint bleed. This little step can save you hours of cleanup later on.
Next, think about covering those surfaces that aren’t supposed to be painted. Lay down some rosin paper or plastic sheeting over your countertops and floors. It’s like giving your space a protective blanket against any paint mist or splatters.
And don’t forget to use drop cloths around your workspace. They’re great for catching any overspray that might escape your intended target. Not only does this simplify cleanup, but it also prevents any accidental paint mishaps on your flooring.
Now, let’s talk about airflow. Setting up a sealed barrier with something like a zip wall can reduce dust and help keep overspray at bay. It might sound like a hassle, but it’s a smart way to maintain a cleaner environment for your project.
Also, distance from the cabinet surface matters. Try to keep the spray nozzle about 10-16 inches away. This helps ensure even coverage and reduces the chances of overspray. Why is that important? Too close, and you risk an uneven look and unwanted paint on surfaces you didn’t intend to coat.
For best results on delicate surfaces like cabinetry edges, consider using Scotch Delicate Surfaces Painters Tape which leaves no residue for up to 60 days, ensuring a clean finish without damage.
Tips for Peeling Tape Without Damage
How can you peel painter’s tape without damaging that fresh paint job?
Peeling tape can feel a bit nerve-wracking—especially when you’ve just put all that effort into getting your walls looking perfect. Here are some simple tips to make sure you don’t ruin your hard work:
- Peel at an Angle: Try pulling the tape back at a 45-degree angle. This small trick can really help minimize any damage and gives you a clean edge, which makes all the difference.
- Timing Matters: You’ll want to remove the tape while the paint is still slightly wet. This makes a big difference because it can prevent dried paint from coming off with the tape.
What if you left the tape on for a few days? No biggie! Just score the edge with a utility knife before you start peeling. This little step is super helpful, as it separates the tape from the paint more effectively.
Also, consider using quality tape. High-quality painter’s tape made for delicate surfaces tends to reduce paint bleed and makes the removal process much easier. It’s one of those things that can save you a lot of headaches later.
Lastly, don’t forget to check if the surfaces are cured properly based on the paint type you’ve used. This ensures you avoid complications when pulling up the tape.
For the best results, make sure to choose a tape with clean removal properties to prevent residue and wall damage.
Final Inspection Before Painting: Key Steps to Success
Before diving into painting kitchen cabinets, you’ve got to nail that final inspection. Do you really want to be halfway through the project only to spot a mistake? Here’s how to make sure everything’s set for success:
- Labeling and Removing: Make sure each cabinet door and drawer is labeled and removed. This little step can save a ton of headaches later when you’re trying to put everything back together.
- Masking Openings: Grab some 9-inch paper to mask up the openings of those cabinet doors and drawers. This prevents any unwanted overspray, which can create a real mess.
- Securing Edges: When you’re applying painter’s tape, make sure it’s pressed on firmly at the edges. This helps create sharp lines and stops paint from seeping where it shouldn’t.
- Sealing Gaps: It’s important to seal all gaps between your cabinets and the walls with caulk. Remember, a professional finish is all about those little details!
- Final Inspection: Take a moment to check all those masked areas. Are everything covered properly? This step is crucial for ensuring ideal paint adhesion.
- Additionally, when working with paint fumes, using a NIOSH-approved respirator is essential to protect your health during the project.
With this thorough inspection, you’re setting yourself up for a smooth painting project. So, what’s holding you back from getting started?
Frequently Asked Questions
How to Prevent Grease Build up in Kitchen Cabinets?
To keep our kitchen cabinets gleaming like stars, let’s apply grease-resistant coatings and use effective cabinet cleaning solutions. Regular maintenance’s the key—together, we’ll banish grease buildup and enjoy a sparkling kitchen oasis!
How to Mask Kitchen Cupboards Before Spraying?
To mask kitchen cupboards before spraying, let’s use masking tape around edges for a tight seal, and cover surfaces with protective sheeting. This way, we’ll avoid overspray and keep everything looking sharp and clean.
What Is the 1 3 Rule for Cabinets?
Did you know that following the 1-3 Rule can save us up to 75% on cleanup time? For cabinets, we should mask one part while surrounding three parts, especially when considering cabinet sizing and paint selection.
How to Avoid Brush Strokes When Painting Kitchen Cabinets?
To avoid brush strokes when painting kitchen cabinets, we should use proper brush techniques, apply thin coats, and choose quality paint finishes. Holding the brush correctly and sanding between coats makes a noticeable difference, too.


